In this tutorial, you will learn how to:
• Access and set up Enhanced Push-to-Talk
• Create a contact
• Make a call
• In-call options
• End a call
Access and set up Enhanced Push-to-Talk
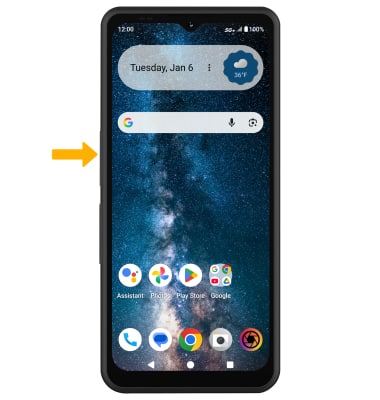
1. From the home screen, press the XCover button.
Note: If it is your first time accessing AT&T Push-to-Talk, review the permissions and select Allow. Review the Location permissions prompt, then select Allow all the time.
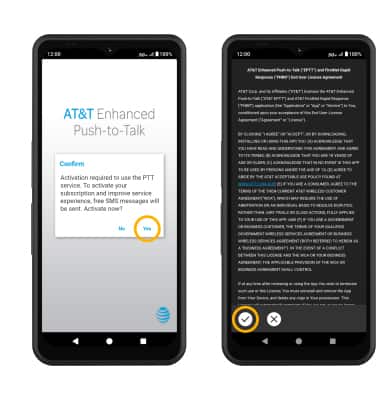
2. Review the "Confirm activation" prompt, then select Yes. Review the End User License Agreement, then select the Checkmark icon.
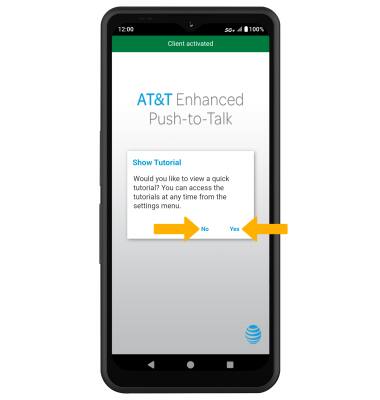
3. Review the tutorial prompt, then select the desired option.
Create a contact
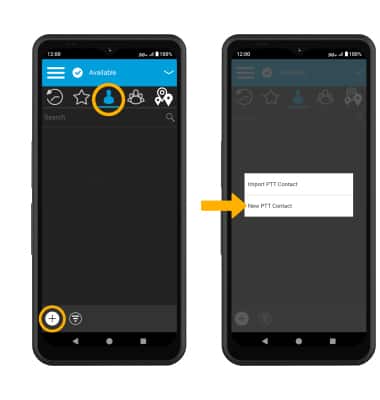
1. From the Enhanced Push to Talk app, select the Contacts Tab. Select the Add icon, then select New PTT Contact.
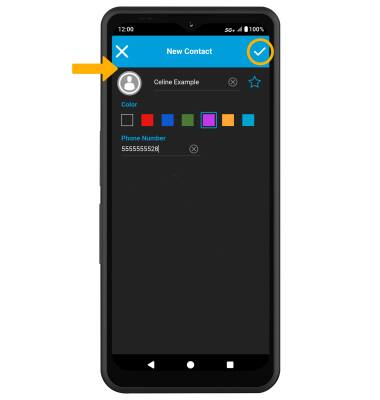
2. Enter the desired contact information, then select the Checkmark icon.
Note: To import an already existing contact, from the PTT options screen, select Import PTT Contact. Follow the prompts to import a contact.
Make a call
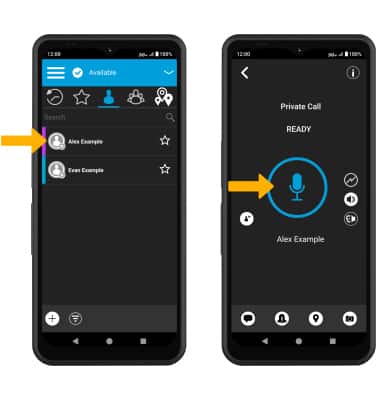
1. From the Contacts tab, select the desired contact. Press and hold the E****PTT button and begin speaking to make a call.
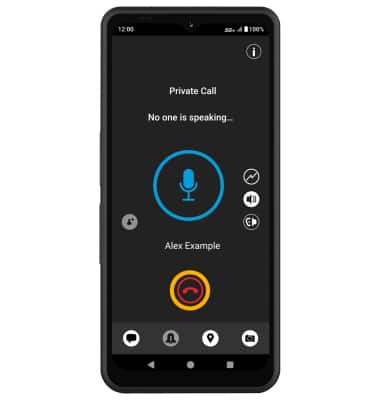
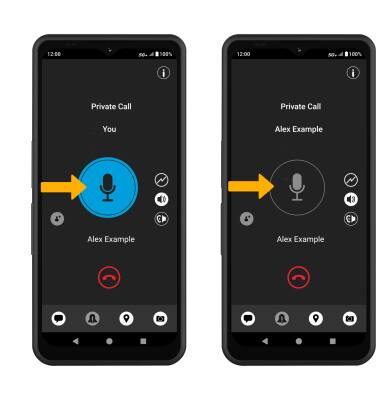
2. While on a call, press and hold the EPTT button while speaking to talk to the call recipient. The Microphone icon will be highlighted with a blue background. When the call recipient is talking, the Microphone icon will turn gray.
In-call options
While on an active call, select the desired in-call option.
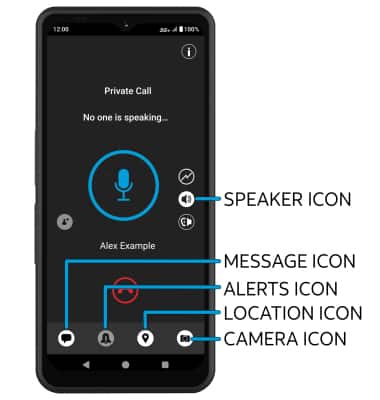
• TURN SPEAKER ON/OFF: To turn the Speaker on or off, select the Speaker icon.
• SEND AN ALERT: To send an Instant Personal Alert, select the Alert icon.
• SEND LOCATION: To send your location, select the Location icon. Review your location on the map, then select the Send location icon.
• SEND A MESSAGE: To send a message, select the Message icon and follow the prompts.
• SEND A PHOTO: To send a photo or video, select the Camera icon and select the desired option.
End a call
Select the End Call icon.