Add a Printer to a Static IP address
In this tutorial, you will learn how to:
• Reserve a Static IP address
• Add the Printer to Your Computer
• Test Your Printer
Most wireless printers use the 2.4 GHz Wi-Fi band, which has better range than 5 GHz—so if your printer doesn’t appear, check your Wi-Fi band settings. If you need in-depth guidance for your specific printer model, consult the printer manufacturer’s support documentation or online setup wizard.
Reserve a Static IP
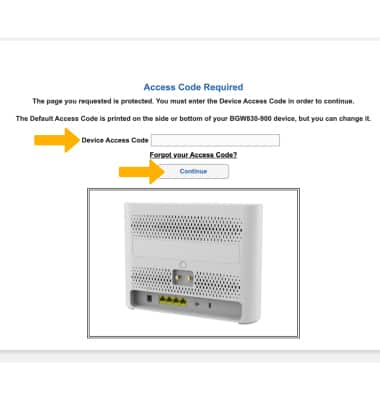
1. From your device’s web browser, go to https://192.168.1.254. Enter your device access code, then click Continue.
Note: Ensure that your device is connected to your AT&T BGW830's Wi-Fi network. For more information, please see the Connect Devices to Wi-Fi or Connect PC or Mac to Wi-Fi tutorials. Use the Device Access Code located on the back of the device.
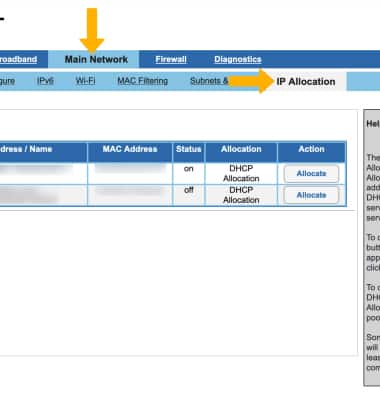
2. Select the Main Network tab, then select IP Allocation.
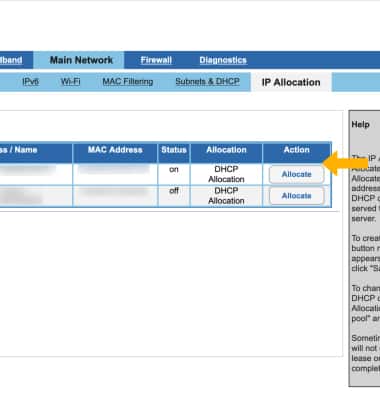
3. A list of devices connected to the AT&T BGW830 will be displayed. Identify the printer that you would like to set a static IP address in the displayed list. Select Allocate next to the desired device.
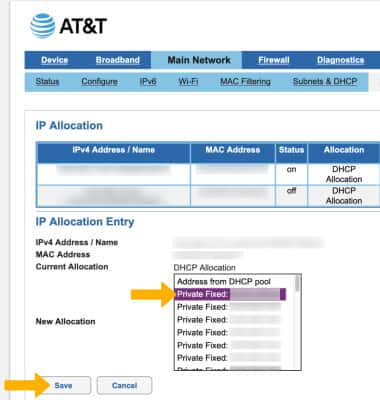
4. A new allocation list will be displayed. Select the desired IP you would like to assign to the printer, then select Save..
Add the Printer to Your Computer
WINDOWS: 1. Settings > Devices > Printers & scanners > Add a printer or scanner.
2. Windows should detect the printer automatically. If not, click “The printer that I want isn’t listed” and follow the prompts.
MAC: 1. System Preferences > Printers & Scanners > + (Add)
2. Select your printer from the list.
Test Your Printer
• Print a test page from your computer to confirm connectivity.