Companion App: Calls, Contacts, Messages
Learn how to call or message your child, add or edit a contact, and set up a SOS contact through the AT&T amiGO™ app.
![]()
The AT&T amiGO™ app comes pre-installed on AT&T amiGO™ devices. To pair a smartphone with your AT&T amiGO™ device, you must first install the app on your smartphone. Visit the Download Apps & Games tutorial for instructions on how to download the AT&T amiGO™ app.
In this tutorial, you will learn how to:
• Call or message your child
• Access messages from the AT&T amiGO™ app
• Set an SOS contact
• Create a contact
• Edit a contact
• Delete a contact
To access the AT&T amiGO™ app, navigate to and select the ![]() AT&T amiGO™ app.
AT&T amiGO™ app.
Call or message your child
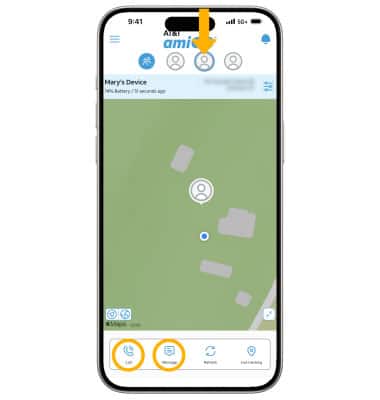
• CALL: Select the Call icon.
• MESSAGE: Select the Message icon. Enter your message, then select the Send icon.
Access messages from the AT&T amiGO™ app
 AT&T amiGO™ app on your connected smart phone, select the
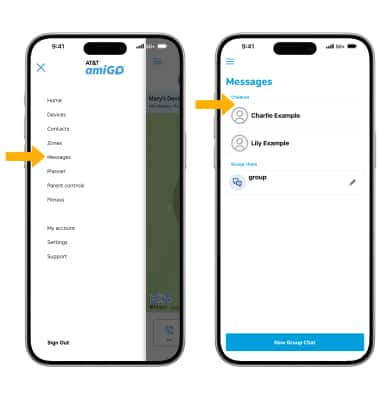
Set an SOS contact
The SOS contact will automatically be synced to the account set as the primary guardian upon initial setup.
Note: Only assigned contacts can communicate with your amiGO™ Jr. Phone. The AT&T amiGO Jr. Phone will not be able to call or text or receive calls or texts from anyone who is not an assigned contact.
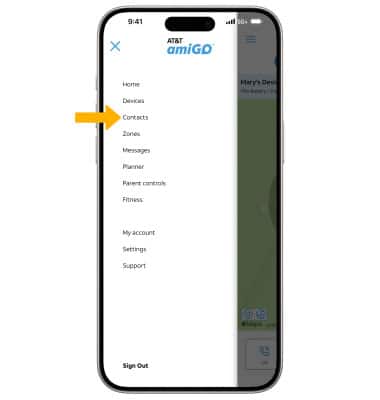
Create a contact
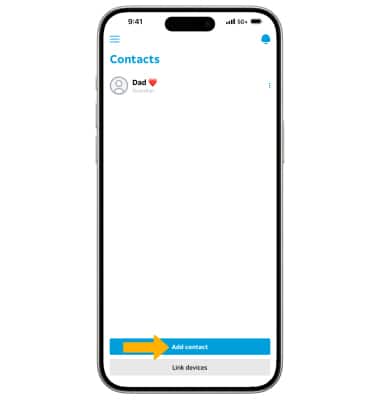
1. From the AT&T amiGO™ app on your connected smart phone, select the ![]() Menu icon then select Contacts.
Menu icon then select Contacts.
Note: To enable your child to create their own contacts on the AT&T amiGO™ Jr. Phone, from the parent device, navigate to the desired device > Parent control > Device settings > select the Manage contacts switch.
2. Select Add contact.
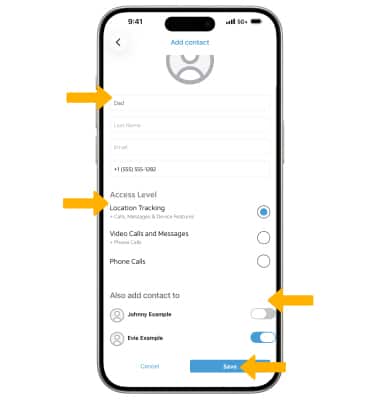
3. Enter the contact information as desired, then select the desired access level. Scroll to and select the switch next to the desired device(s) to add the contact to. When finished, select Save.
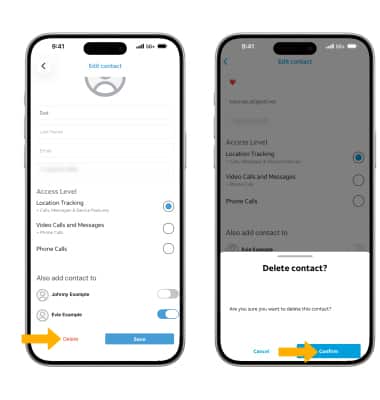
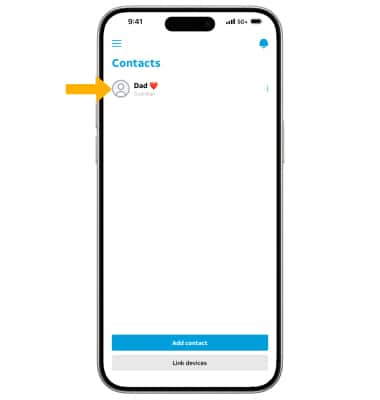
Edit a contact
1. From the all contacts screen, select the desired contact.
2. Edit the contact information as desired, then select Save.
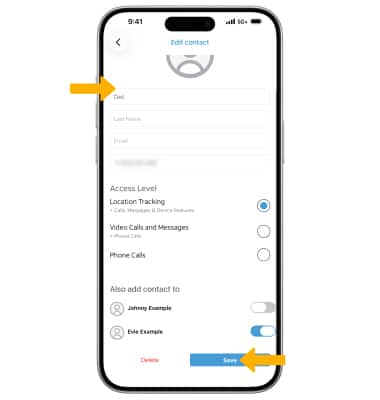
Delete a contact
From the edit contact screen, select Delete. Select Confirm to confirm.