In this tutorial, you will learn how to:
• Change Portrait Mode lighting
• Use Stage Light Mono
• Preserve camera settings
• Crop or edit a photo
• Use Live Text with Video
• Isolate image from background
Access camera modes, filters and styles
Swipe left or right to access camera modes such as Time Lapse Video, Cinematic, Slo-mo Video, Video, Photo, Portrait, and Pano.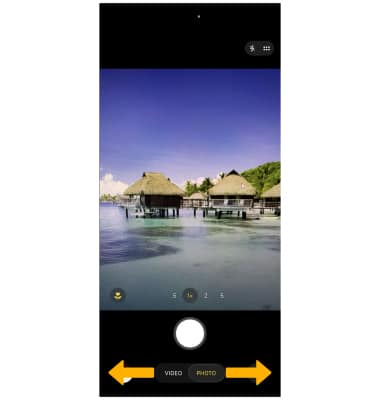
To access filters or photographic styles, select Photo at the bottom of the screen, then select Styles.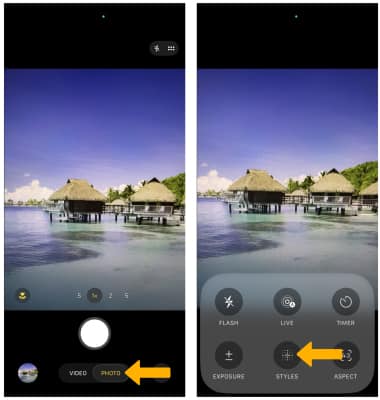
Swipe right or left to navigate to the desired style or filter. Edit the Style settings as desired.
Note: Filters are not available in some camera modes.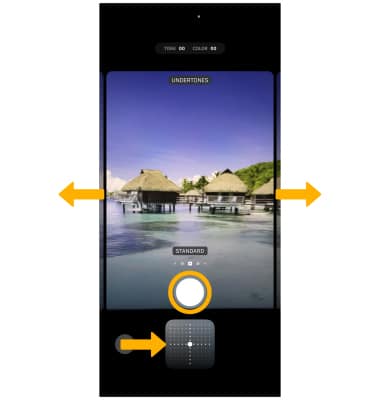
Change Portrait mode lighting
Portrait mode captures a picture with a sharp subject against a blurred background. You can add portrait lighting for dramatic effects. To access Portrait mode, from the camera screen, swipe left or right to Portrait mode. Scroll left or right on the bottom of the screen to the desired light setting.
Note: Your photo depth preferences will be stored, allowing you to change or add to your desired lighting effects at a later time.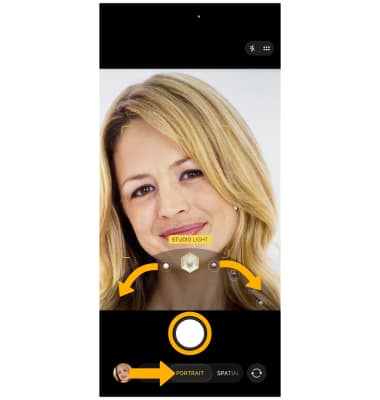
Use Stage Light Mono
1. Stage Light Mono allows you to take a photo with the High-Key Mono portrait lighting effect and a real-time effect preview. These computational portrait lighting effects can be easily adjusted right in the Photos app, even after the photo has been taken. From Portrait Mode in the camera app, swipe left on the bottom of the screen until you reach the STAGE LIGHT MONO setting. Select the Capture icon to take a picture.
Note: A real-time preview shows you exactly how the photo will look before you snap it. The Camera app also tells you when you’re too close, too far away or if the area is too dark.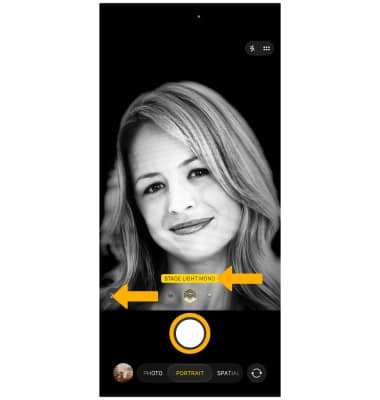
2. To adjust the High-Key Mono portrait lighting effect, from the home screen, select the ![]() Photos app. Scroll to and select Portrait.
Photos app. Scroll to and select Portrait.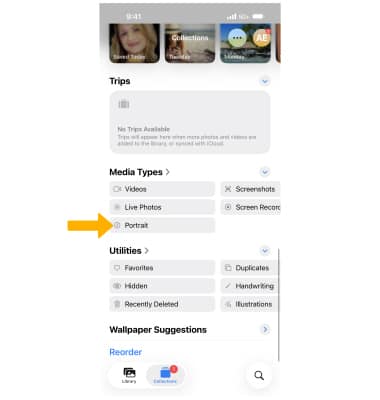
3. Select the desired Portrait mode photo that you would like to edit then select the Edit icon.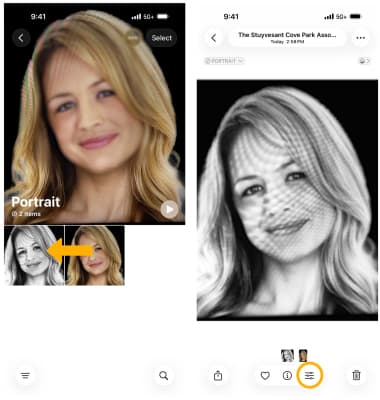
4. Edit the photo as desired. When finished, select Done to save the changes.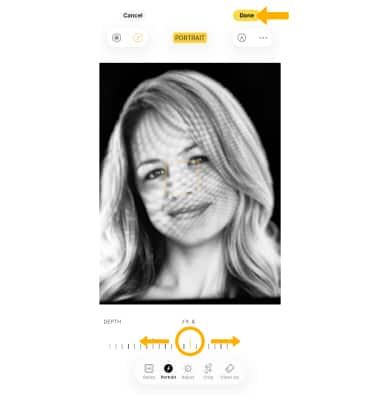
Preserve camera settings
Camera preservation settings allow you to preserve the last camera mode or filters used instead of resetting to Photo mode when you reopen the camera. To preserve camera settings, from the home screen, select the ![]() Settings app > scroll to and select Camera > select Preserve Settings >
Settings app > scroll to and select Camera > select Preserve Settings > ![]() Camera Mode or
Camera Mode or ![]() Creative Controls switch.
Creative Controls switch.
Note: To learn more about camera settings visit the Camera and Video Settings tutorial.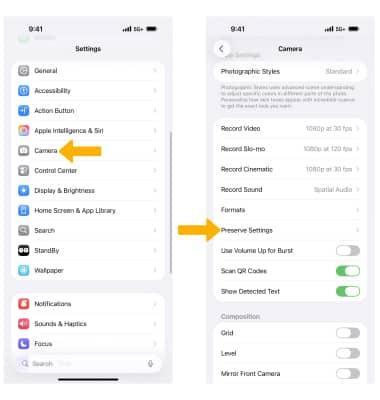
Crop or edit a photo
1. From the Camera app, select the Gallery icon. Swipe right to the desired photo, then select the Edit icon.
Note: Alternately, from the home screen select the ![]() Photos app then navigate to and select the desired photo.
Photos app then navigate to and select the desired photo.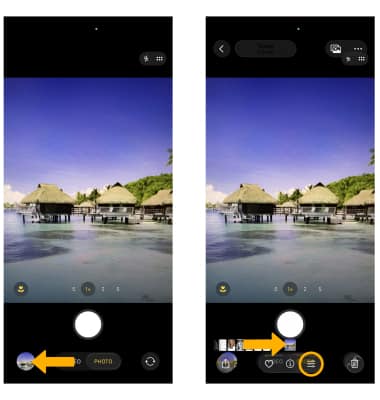
2. Select the Crop icon. Select and drag the crop corners to crop as desired, then select Done.
Note: To further edit photos, from the editing screen, select the desired feature then edit settings as desired.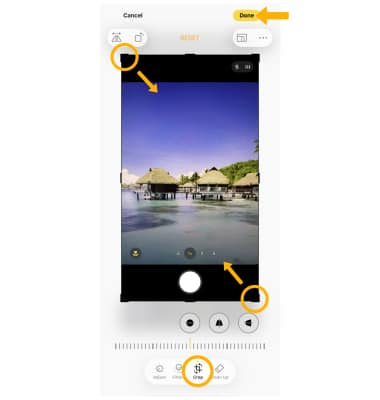
Use Live Text with Video
Live Text now works with videos. Pause any video to a frame with text and use Live Text to scan text to share, look up, translate and more.
From the ![]() Photos app, navigate to and select the desired video. Select the pause icon at the desired time. Select the Live Text icon, then select and hold the desired text. Select the desired option.
Photos app, navigate to and select the desired video. Select the pause icon at the desired time. Select the Live Text icon, then select and hold the desired text. Select the desired option.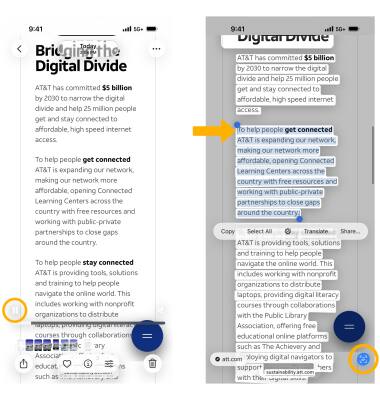
Isolate image from background
Isolate the subject of an image from its background. You can then drag the isolated image into another app as an attachment such as the Messages, Mail or Notes app.
1. From the desired image in the ![]() Photos app, select and hold the subject of the desired image, then select Copy.
Photos app, select and hold the subject of the desired image, then select Copy.
Note: You can use Visual Look Up to get more information about an isolated subject. Select Look Up from the callout bar. You can also isolate multiple subjects at a time. After isolating a subject, select Select All from the callout bar.
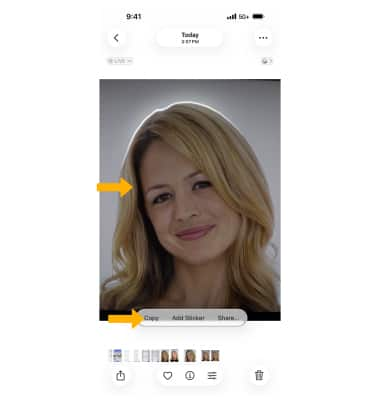
2. With your isolated image copied, navigate to the desired app, then select and hold the desired location. Select Paste.
Visual Lookup
With Visual Look Up, you can discover similar recipes from photos of food, identify plants or dogs, map routes to stores identified in photos, and the meaning of signs and symbols on things like laundry tags. You can also Look up information about objects that appear in paused video frames.
From the ![]() Photos app, navigate to and select the desired image. Select the Information icon, then select Look Up Maltese. Results based off of the image will be displayed. Swipe up to view additional search results.
Photos app, navigate to and select the desired image. Select the Information icon, then select Look Up Maltese. Results based off of the image will be displayed. Swipe up to view additional search results.
Note: In this example, a Maltese was used. 'Look Up Maltese' will change based off of what is identified (i.e. Look Up Food). If you are using visual lookup within a video, pause the video > select and hold the desired object > select Look Up for more information.

