Connect a Printer
Connect a Printer

In this tutorial, you will learn how to:
• Connect a Printer
• Connect a Printer to Your Computer
• Test Your Printer
Connect a Printer
WI-FI: 1. Find Your Wi-Fi Network Name (SSID) and Password.These can be located on a label on the bottom of the AT&T BGW830 or in the device dashboard.
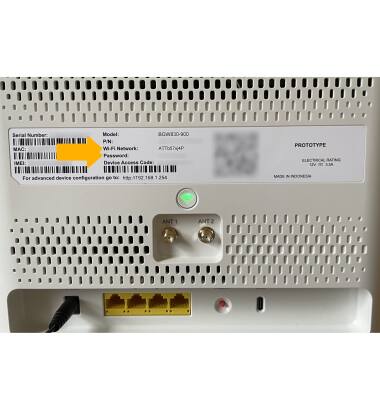
2. Use the Printer’s Control Panel On the printer, navigate to the network or wireless settings menu. Select “Wi-Fi Setup Wizard” (name may vary by printer brand).
3. Select your AT&T BGW830's network name (SSID). Enter the Wi-Fi password, then select Connect.
ETHERNET: Plug an Ethernet cable from the printer into an available LAN port on the AT&T BGW830. The printer should auto-connect to the network. Some printers may require you to confirm network settings on the printer’s control panel.
Connect the Printer to Your Computer
WINDOWS: 1. Settings > Devices > Printers & scanners > Add a printer or scanner.
2. Windows should detect the printer automatically. If not, click “The printer that I want isn’t listed” and follow the prompts.
MAC: 1. System Preferences > Printers & Scanners > + (Add)
2. Select your printer from the list.
Test Your Printer
• Print a test page from your computer to confirm connectivity.