")
In this tutorial, you will learn how to:
• Access the Compass app
• View directional information
• Create and edit Compass Waypoints
• Use Backtrack
• Use Elevation view
Access the Compass app
From the clock screen, press the Digital Crown/Home button then select the ![]() Compass app.
Compass app.
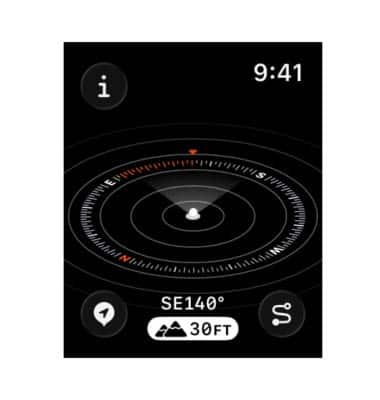
View directional information
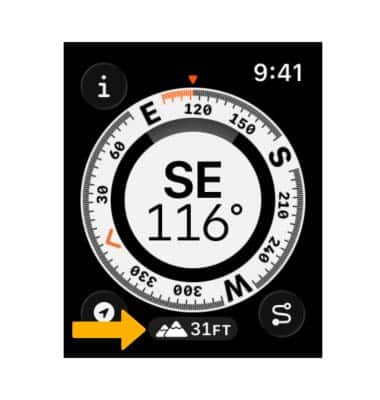
Your bearing is shown at the center of the watch face.
Note: Alternately, you can view you bearings, elevation, incline, and coordinates by selecting the ![]() Info icon.
Info icon.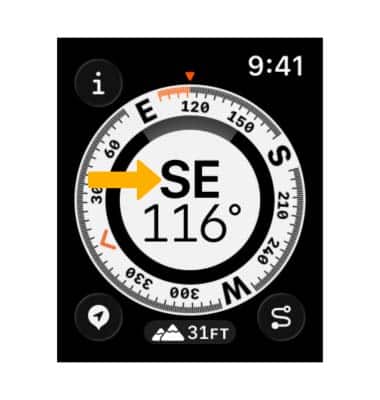
Rotate the Digital Crown to see your incline, elevation, and coordinates in the inner ring of the compass. Continue scrolling to show the location of waypoints you created.

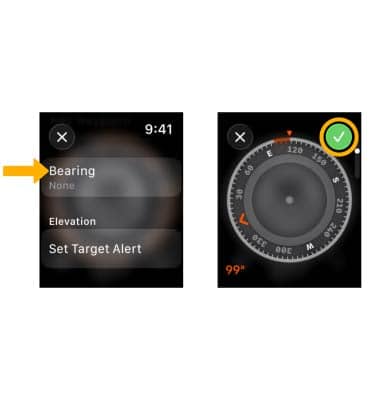
To add or edit a bearing, select the ![]() Info icon then scroll to and select Bearing. Adjust the Bearing by rotating the Digital Crown, then select the Checkmark icon.
Info icon then scroll to and select Bearing. Adjust the Bearing by rotating the Digital Crown, then select the Checkmark icon.
Note: To clear a bearing, from the Info screen, scroll to and select Clear Bearing.
Create and edit Compass Waypoints
1. From the Compass screen, select the Waypoint icon. Select the desired options to enter the waypoint information such as label, color, or symbol, then select the Checkmark icon when finished.
Note: Compass Waypoints are only available for Apple Watch Series 6 and later, Apple Watch SE 1st gen and later, and the Apple Watch Ultra series. On the Apple Watch Ultra and Ultra 2, you can drop a Waypoint using the Action button. To assign Waypoint to the Action button, from the clock screen, press the Digital Crown/Home button then select the ![]() Settings app > Action Button > Choose Action > Waypoint. To use, simply press the Action button to drop a Waypoint.
Settings app > Action Button > Choose Action > Waypoint. To use, simply press the Action button to drop a Waypoint.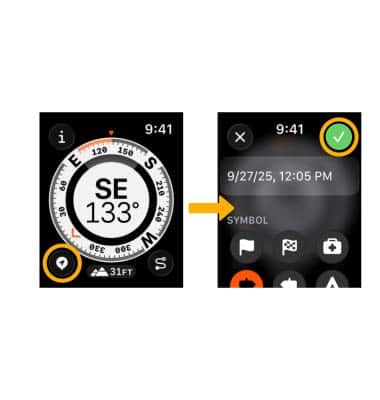
2. To edit a Waypoint, from the Compass screen select the desired Waypoint > Select > ![]() Edit icon > editing information as desired then select the back arrow.
Edit icon > editing information as desired then select the back arrow.
Note: To delete a Waypoint, from the Edit screen, scroll to and select Delete Waypoint. Select Delete to confirm.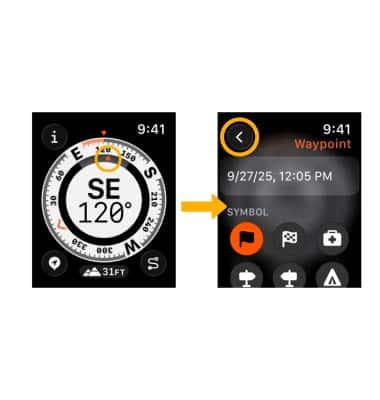
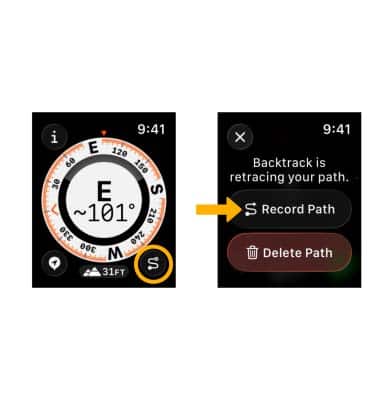
Use Backtrack
1. You can use the Compass app to track your route and then help you retrace your steps in case you get lost. To use, from the Compass screen, select the Backtrack icon then select Record Path.
Note: Backtrack is only available for Apple Watch Series 6 and later, Apple Watch SE 1st gen and later, and the Apple Watch Ultra series. On the Apple Watch Ultra and Apple Ultra 2, you use the Action button to start Backtrack. To assign Waypoint to the Action button, from the clock screen, press the Digital Crown/Home button then select the Settings app > Action Button > Choose Action > Backtrack. To use, press the Action button to start Backtrack. Press the Action and Side buttons at the same time to pause Backtrack.
2. To retrace your steps, select the Backtrack icon then select Retrace Path. 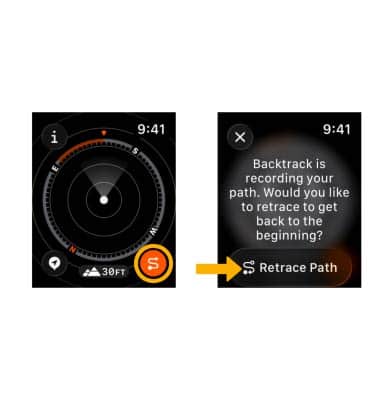
3. The location where you first selected the Backtrack icon appears on the compass. Follow the path back to return to where you first turned on Backtrack.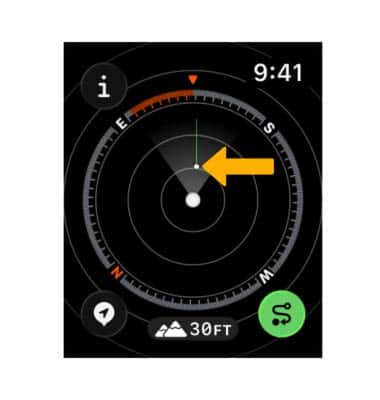
4. When you’re finished, select the Backtrack icon again then scroll to and select Delete Path.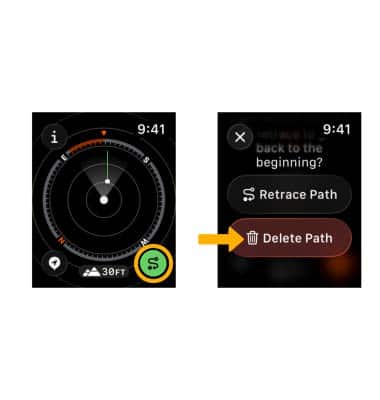
Use Elevation view
1. To use Elevation view, from the Compass screen, select the Elevation icon.
2. Here you can see three-dimensional view of where you have been via your Waypoints.
Note: Your Apple Watch will automatically generate two new waypoints in Elevation view - one that shows the last place you had a cell signal (the Last Cellular Connection Waypoint) and another that shows where on your route you can make an emergency call ( the Last Emergency Call Waypoint).