")
In this tutorial, you will learn how to:
• Pair child's phone
• Set schedule
• Add or remove app access
• Add or edit time limits
Pair child's phone
1. From your connected smart phone, navigate to and select the  AT&T amiGO™ app.
AT&T amiGO™ app.Note: For directions on how to set up your AT&T amiGO™ Jr. phone, visit Device Setup. When you progress through device setup a QR code will be displayed on the AT&T amiGO™ Jr. Phone.
2. To create an amiGO account, select Create an account and follow the prompts. If you already have an account, select Sign In.
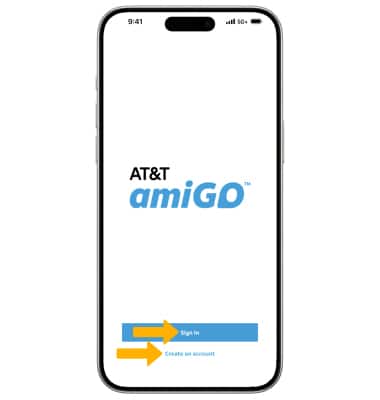
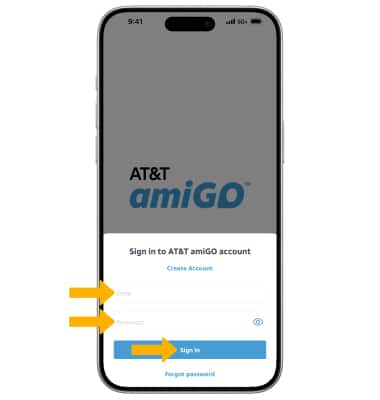
3. Enter your Email and Password, then select Sign In.
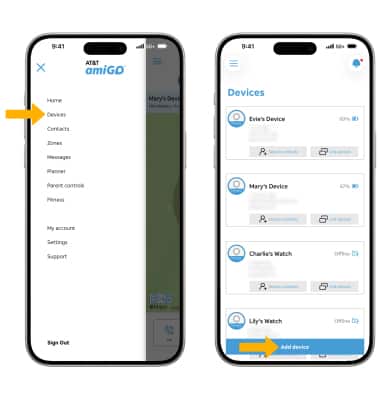
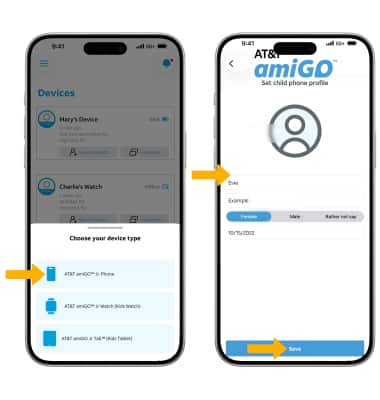
4. Select the  Menu icon, then select Devices. Select Add device.
5. Select AT&T amiGO™ Jr. Phone. Enter the desired child phone profile details, then select Save.
5. Select AT&T amiGO™ Jr. Phone. Enter the desired child phone profile details, then select Save.
5. Scan the QR code displayed on the AT&T amiGO™ Jr. phone.
Note: You can also select Enter code manually to enter in the details.
Note: You can also select Enter code manually to enter in the details.
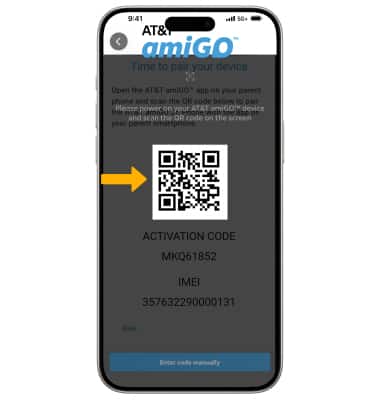
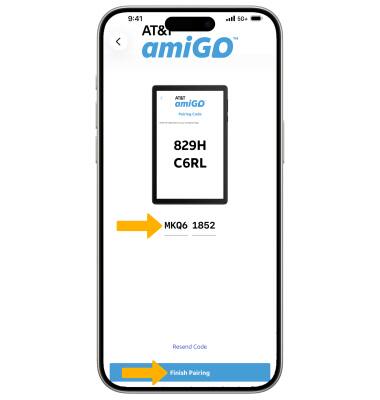
6. Enter the ACTIVATION CODE displayed on the AT&T amiGO™ Jr. Phone, then select Finish Pairing.
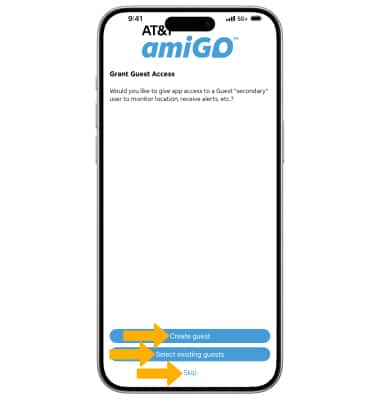
7. If you would like to add secondary users to help monitor the child's phone, select Create guest or Add existing guests. Select Skip to continue without added secondary users.
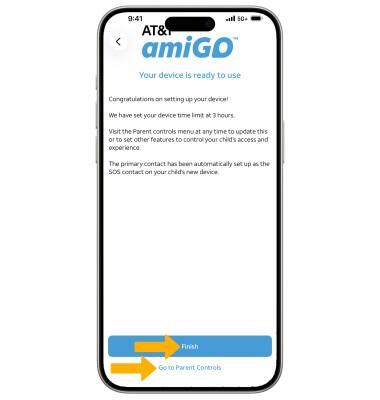
8. The device is now set up. Select Finish to continue or select Go to Parent controls to further customize the AT&T amiGO™ Jr. Phone.
Add, remove or download an app
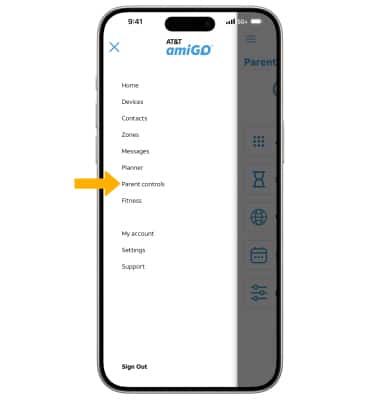
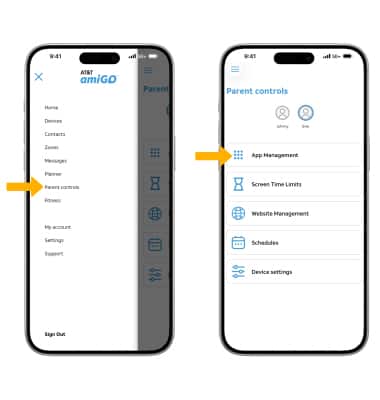
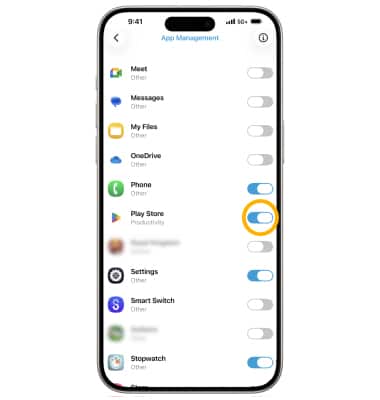
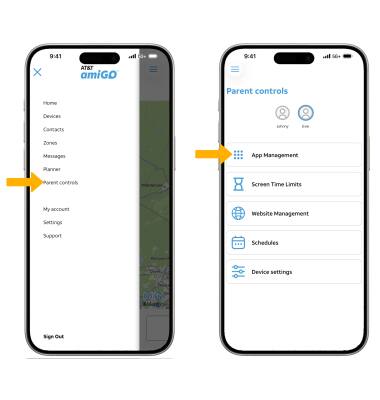
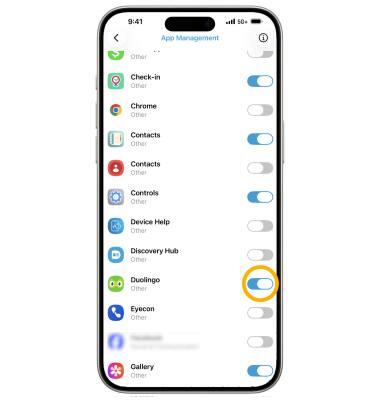
ADD OR REMOVE AN APP: From the AT&T amiGO™ app, select the Menu icon then select Parental controls.
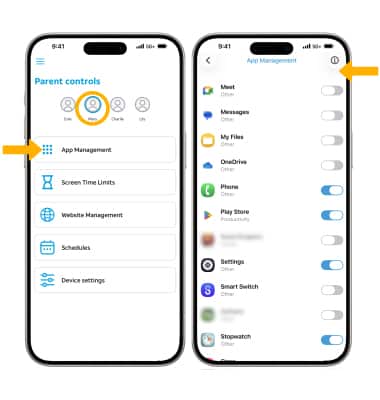
2. With the desired device highlighted, select App Management. Select the switch next to the app you wish to add or remove from the AT&T amiGO™ phone.
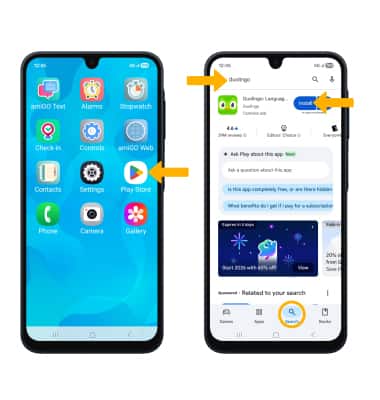
DOWNLOAD AN APP: 1. To download an app on the child's device, the Play Store app must be enabled on the AT&T amiGO™ app. From the AT&T amiGO™ app, select the Menu icon then select Parent controls. Select App Management.
2. Scroll to and select the switch next to the Play store app.
3. From the child's phone, navigate to and select the Play Store app. Select the Search tab, then enter the desired app. Select Install.
4. The app must then be enabled on the Parent's device. From the AT&T amiGO™ app, select the Menu icon then select Parent controls. Select App Management.
5. Scroll to and select the switch next to the desired app.
Set screen time limits
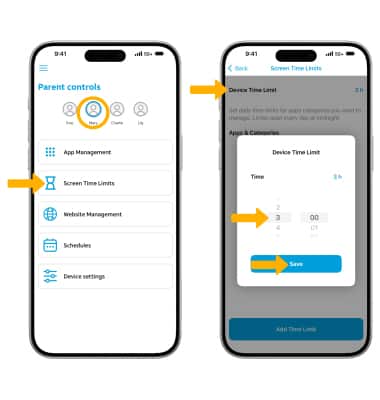
1. To set screen time limits, from the Parental controls screen, ensure the desired device is highlighted, then select Screen Time Limits. Select Device Time Limit. Adjust the time as desired, then select Save.
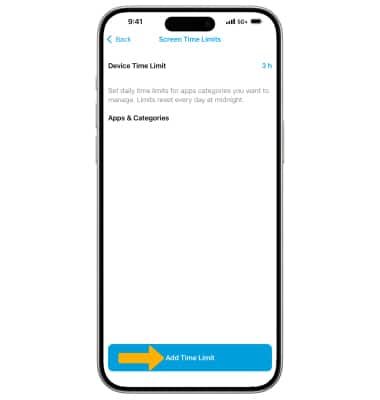
2. To add a screen limit to a specific app, select Add Time Limit.
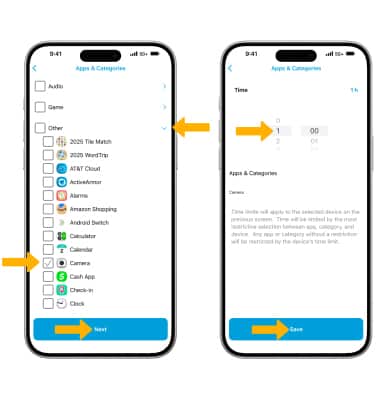
3. Select the desired app category drop-down, then select the checkbox next to the desired app. Select Next. Select the time limit, then select Save.
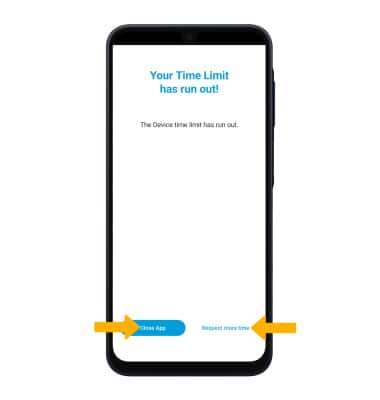
4. When a screen time limit is reached, screen time limit notification will display on your child's device. Select Close App to exited out of the notification, or select Request more time.
Add or edit schedules
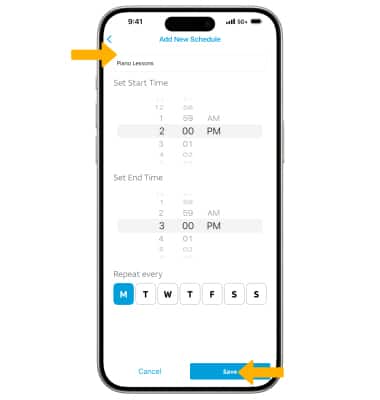
1. To add or edit schedules, from the Parental controls screen, ensure the desired device is highlighted, then select Schedules. Select Add Schedule.

2. Edit the time and information as desired, then select Save.
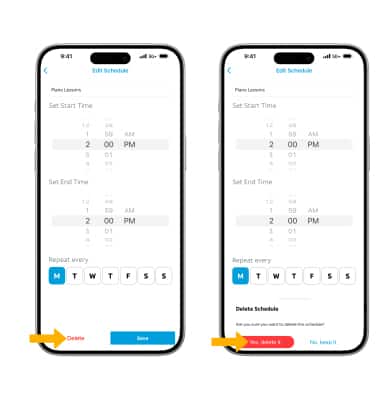
3. To enable or disable a schedule, select the switch next to the desired schedule. To edit a schedule, select the desired schedule. Adjust as desired, then select Save.

4. To delete a schedule, from the schedule edit screen, select Delete. Select Yes, delete it confirm.
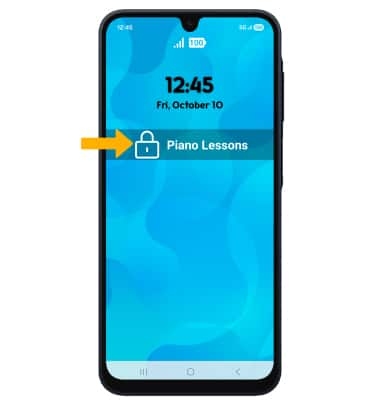
5. When a schedule is active, your child's phone will lock down and the name of the schedule will display on the screen.