")
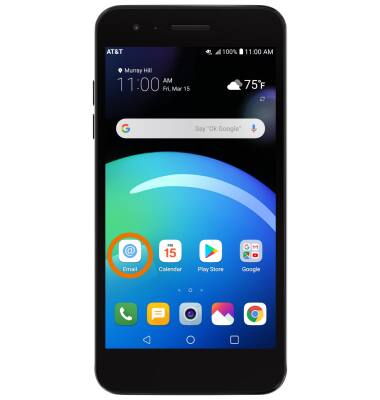
- ACCESS EMAIL SETTINGS: From the home screen, select the Email app.
Note: In order to access email settings, you must have already set up an email account.
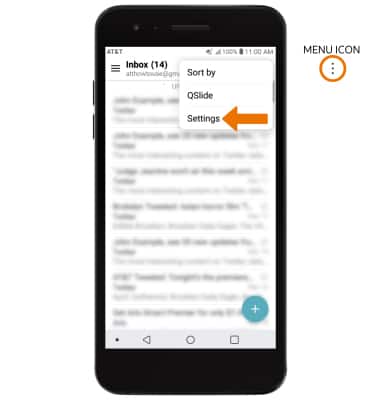
- Select the Menu icon, then select Settings.
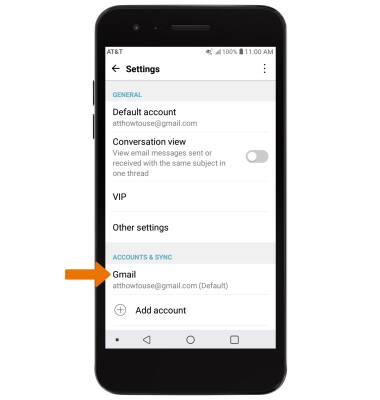
- Edit email settings as desired. To change settings specific to an account, select the desired account under ACCOUNTS & SYNC.
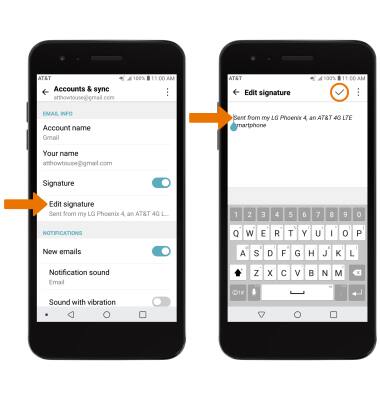
- EDIT EMAIL SIGNATURE: From the desired account's Account & sync Settings screen, select Edit signature > enter the desired email signature > select the Checkmark icon.
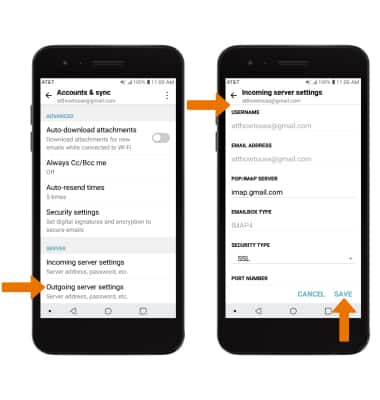
- CHANGE ACCOUNT SERVER SETTINGS: From the desired Account's Settings screen, scroll to and select Incoming server settings or Outgoing server settings > enter desired server settings > SAVE.
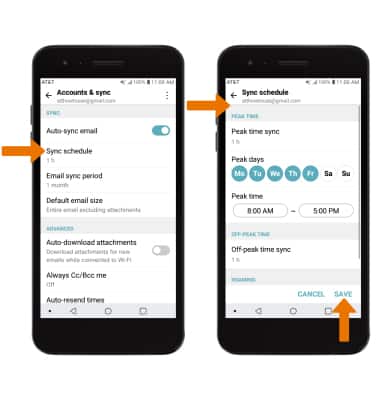
- EDIT SYNC FREQUENCY: From the desired Account's Settings screen, scroll to and select Sync schedule > enter the desired sync preferences > select SAVE.
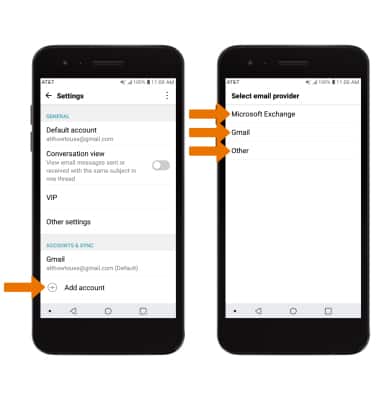
- ADD ADDITIONAL EMAIL ACCOUNTS: From the Email Settings screen, select Add account > desired email provider > follow the prompts.
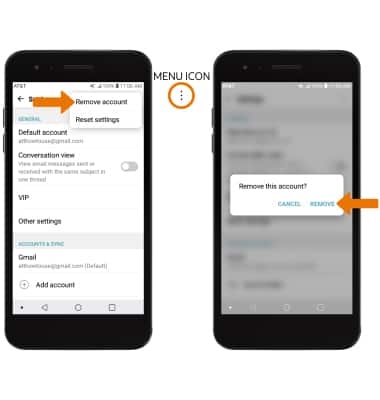
- DELETE AN EMAIL ACCOUNT: From the Email Settings screen, select the Menu icon > Remove account > REMOVE.
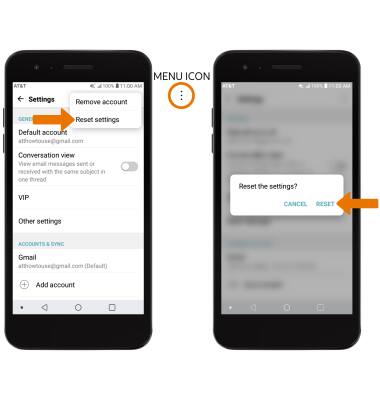
- RESTORE DEFAULT EMAIL SETTINGS: From the Email Settings screen, select the Menu icon > Reset settings > RESET.
Email Settings
LG Phoenix 4 (LM-X210)
Email Settings
Manage email settings such as server settings, signature, sync frequency, add an account, delete an account, and restore default settings.
INSTRUCTIONS & INFO