")
In this tutorial, you will learn how to:
• Access messages
• Compose and send a message
• Read and respond to a new message
• Access and use Smart Reply
• Delete a message
When a new message is received, the ![]() New Message icon will display in the Notification bar.
New Message icon will display in the Notification bar.
Access messages
From the home screen, select the ![]() Messaging app.
Messaging app.
Compose and send a message
1. Select the Start Chat icon.
2. Select the 'To' field > enter the desired contact > select the desired contact.
Note: To create a Group Message, from the 'To' field, select the ![]() Group message icon. Add additional contacts as desired. When finished, select the checkmark icon.
Group message icon. Add additional contacts as desired. When finished, select the checkmark icon.
3. Compose and send a message using the following options as desired.
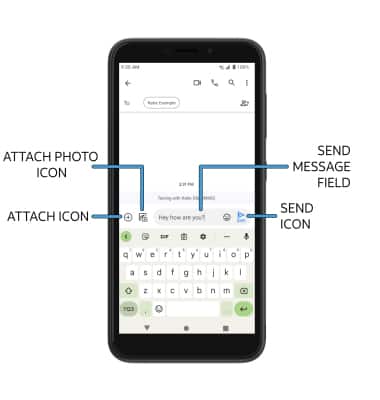
• ADD ATTACHMENT: Select the Attach icon, then follow the prompts to add an attachment or photo. Select the Attach photo icon to attach a photo from the gallery or to take a picture.
• SEND A MESSAGE: When finished composing a message, select the Send icon to send the message.
Read and respond to a new message
From the Messaging inbox, select the desired message thread.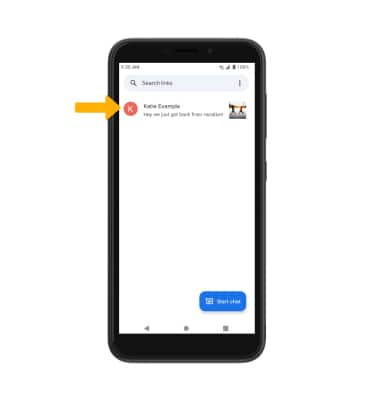
VIEW/SAVE AN ATTACHMENT: To view an attachment, select the desired attachment. To save an attachment, select the ![]() Menu icon then select Save.
Menu icon then select Save.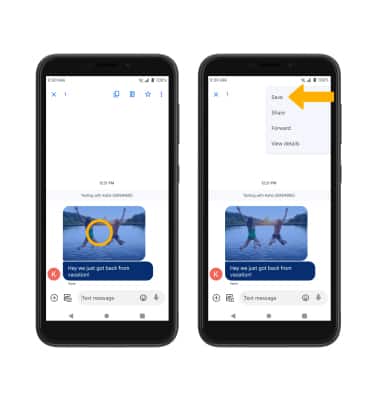
RESPOND TO A MESSAGE: Select the desired option:
• REPLY: Enter the desired message in the 'Send message' field, then select the Send icon.
• FORWARD: Select and hold the desired message, then select the ![]() Menu icon. Select Forward and follow the prompts to forward a message.
Menu icon. Select Forward and follow the prompts to forward a message.
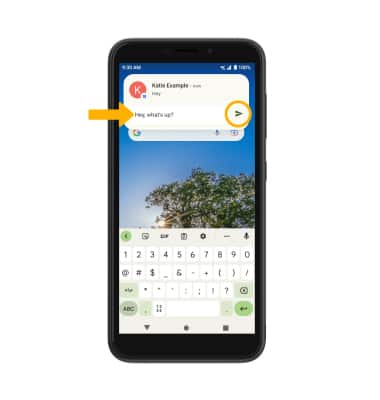
Access and use Smart Reply
Note: Alternately, you can access and respond to new messages by swiping down from the Notification bar. New messages will be displayed.
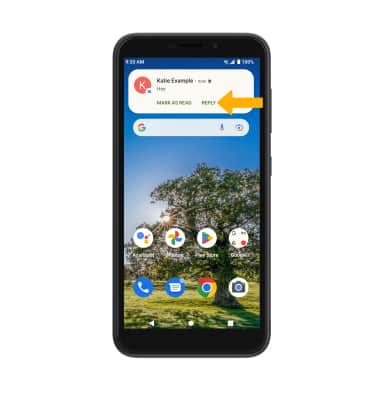
Enter the desired message in the 'Reply' field, then select the Send icon when finished.
Delete a message
From the desired message thread, select and hold the desired message then select the ![]() Menu icon. Select Delete > Delete to confirm.
Menu icon. Select Delete > Delete to confirm.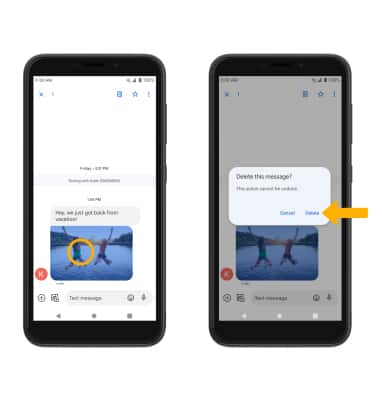
DELETE MESSAGE THREAD: From the Messaging screen, select and hold the desired message thread then select the ![]() Delete icon. Select Delete to confirm.
Delete icon. Select Delete to confirm.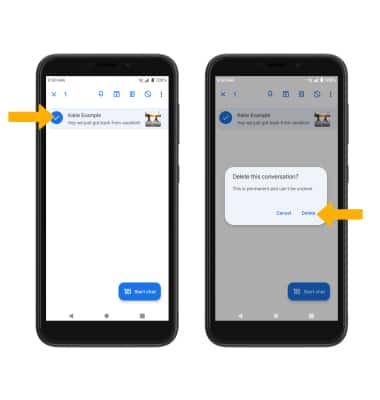
Tips
By default, attachments will be saved to the Messaging folder in the Photos app. To view saved attachments, from the home screen, select the ![]() Photos app > Library tab > Messages folder.
Photos app > Library tab > Messages folder.