")
- ACCESS CONTACTS: From the home screen, swipe up to access the Apps tray then select the Contacts app.
Note: When in Easy mode no Groups tab will display and you can't send business cards, merge accounts or link contacts.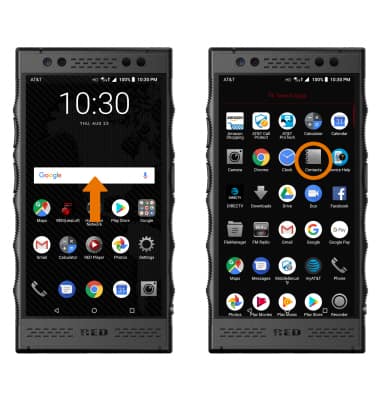
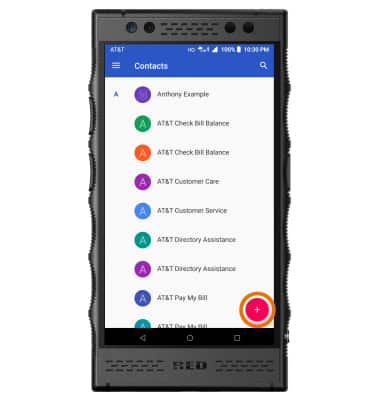
- CREATE A CONTACT: From the Contacts screen, select the Add icon.
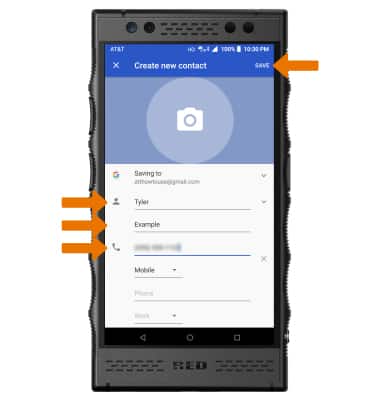
- Select the desired location to store the new contact information.

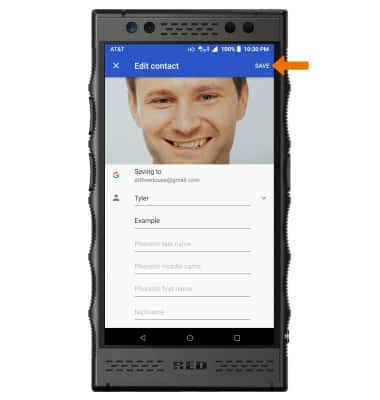
- Enter the desired contact information, then select SAVE.
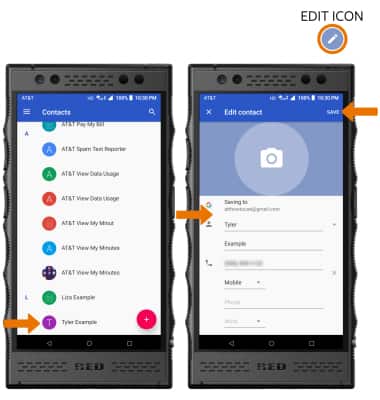
- EDIT A CONTACT: Select the desired contact > EDIT icon > edit the contact information as desired > select SAVE.
- ADD IMAGE TO A CONTACT: While editing a contact, select the Camera icon > Choose photo > navigate to and select the desired image > Crop as desired > select DONE > SAVE.
Note: After selecting the Camera icon, you can also take a photo to use as the contact image.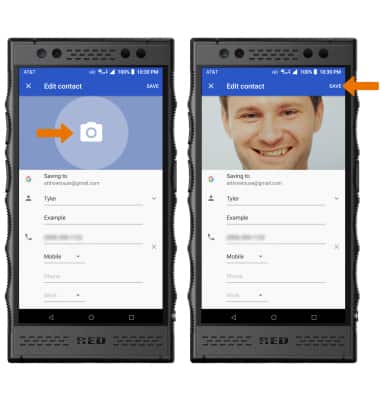
- ADD RINGTONE TO A CONTACT: While editing a contact, scroll to and select More fields > scroll to and select Set Ringtone > desired ringtone > OK.
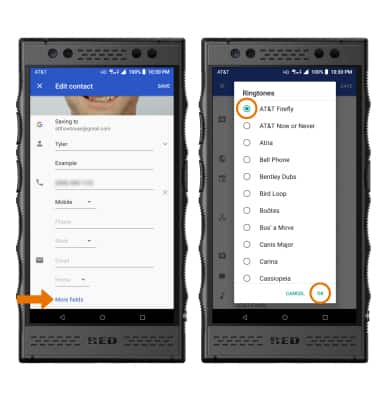
- Select SAVE to save your edits.
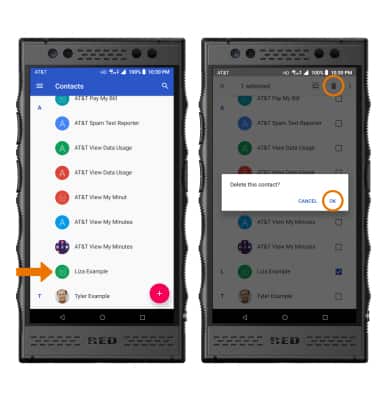
- DELETE A CONTACT: From the Contacts screen, select and hold the desired contact. Select the Delete icon, then select OK to confirm.
- ADD/REMOVE CONTACTS FROM THE SPEED DIAL: From the home screen, select the Phone app > CONTACTS tabs > Menu icon > Settings > Speed dial settings > select the desired speed dial number > enter the desired phone number > OK.
Note: To remove or replace a contact from Speed dial, from the Speed dial settings screen select the desired contact then select Delete to remove the contact or Replace to replace speed dial with a different contact.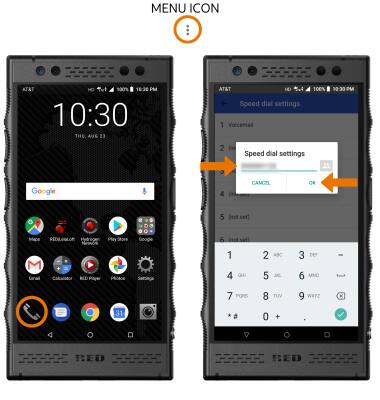
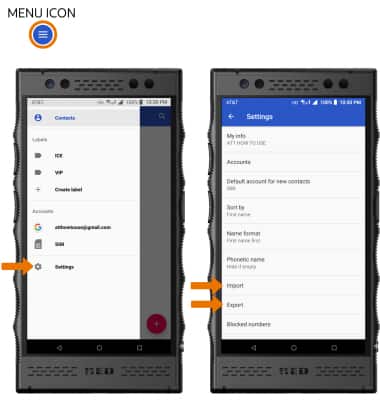
- BACKUP CONTACTS: From the Contacts screen, select the Menu icon > Settings > Import or Export > follow the prompts.
Contacts
RED Hydrogen One (H1A1000)
Contacts
Access contacts, create a contact, edit a contact, add a picture or ringtone to a contact, delete a contact, add or remove a contact to speed dial, and back up contacts.
Contacts
Add, view, delete, and customize contacts by adding a picture or ringtone.
Contacts
1:29
INSTRUCTIONS & INFO