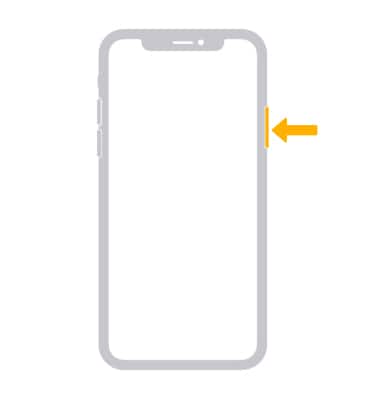
1. To turn iPhone on, press and hold the Side button until the Apple logo displays.
Note: Before setting up your device, make sure you have completed the online activation process. Please see Activate phone, SIM card, or other device for more information. Device setup steps will vary slightly based on the options selected. If your device has already been set up, and you'd like to start over, read the Apple support article How to erase your iOS device and then set it up as a new device or restore it from backups.
2. You'll see "Hello" in different languages. Swipe up to continue.
Note: If you're blind or have low vision, you can turn on VoiceOver or Zoom from the Hello screen. To find your IMEI/MEID and ICCID, select ![]() Info icon in the lower right corner of the screen.
Info icon in the lower right corner of the screen.

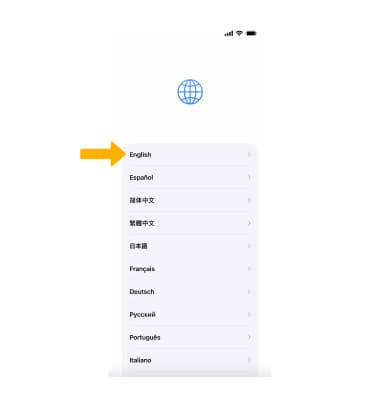
3. Select your language.
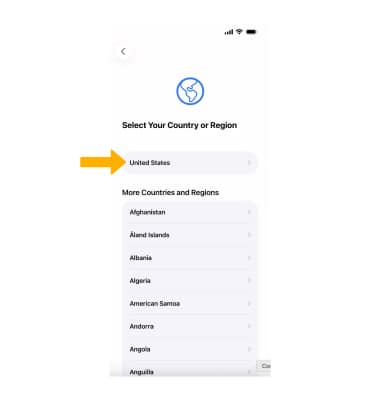
4. Select your country or region.
Note: This affects how information will look on your device, including date, time, contacts, and more.
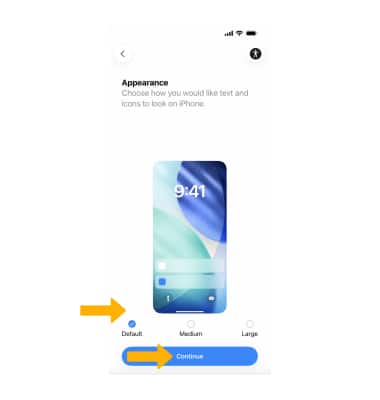
5. Edit the display Appearance as desired, then select Continue.
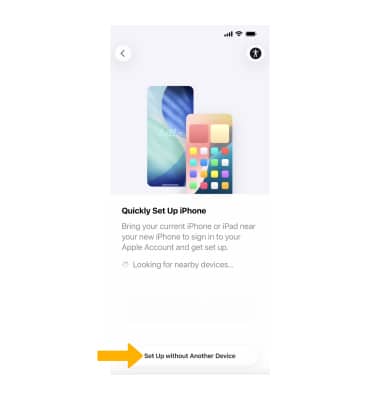
6. Review the Quick Start prompt. Select Set Up Without Another Device to set up your iPhone manually.
Note: Quick Start is a feature that allows you to transfer data and content from an old device to your new one during set up. On your old device select Continue > hold up your new iPhone to the camera of the old phone > enter the old device's passcode on your new device.
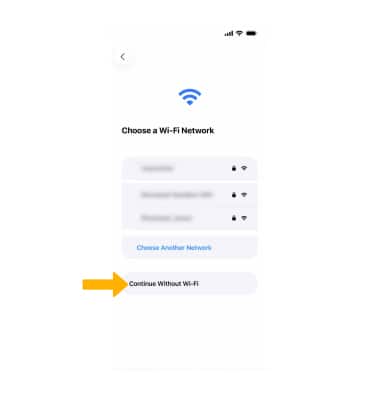
7. Select Continue Without Wi-Fi, then select Continue to confirm.
Note: Get help activating AT&T cell service.
8. Enter your phone number, then select Continue.
Note: The phone number should match the one provided by AT&T when you purchased the device.
9. Enter the 5-digit billing or shipping zip code to verify your identity, then select Continue.
10. Your device will automatically attempt to activate it's eSIM and connect to the AT&T Cellular network. When finished, you will receive a Cellular Setup Complete prompt. Select Transfer from iPhone.

11. Review the Data & Privacy prompt, then select Continue or Learn More.
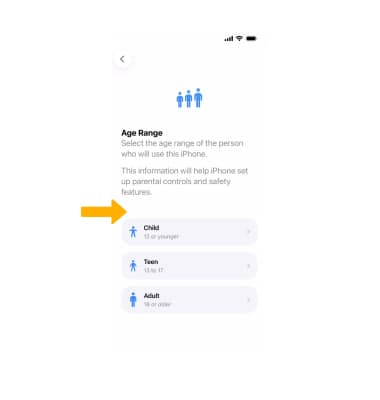
12. Review the Age Range prompt, then select the desired option.
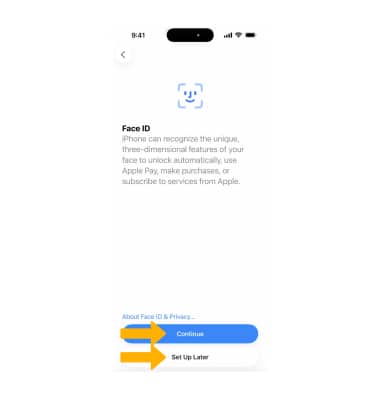
13. Select Continue and follow the prompts to set up Face ID now, or select Set Up Later to skip this step.
Note: You'll need a passcode for features like Face ID and Apple Pay.
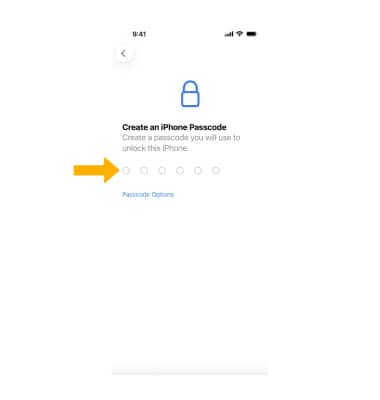
14. Enter the desired Passcode, then re-enter your passcode to confirm.
Note: To skip creating a passcode, select Passcode Options > Don't Use Passcode > Don't Use Passcode.
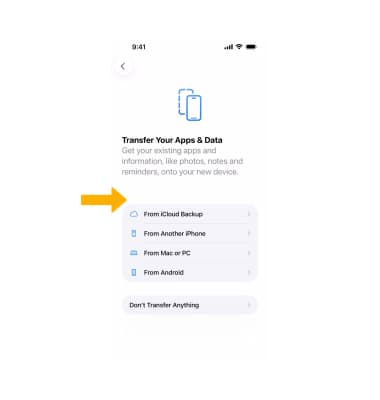
15. You can set up your device as new, transfer data from another iPhone or Android device, or restore it from an iCloud or iTunes backup. Select the desired option and follow the prompts.
Note: For more information, visit Apple's support article: Transfer content from an iPhone, iPad, or iPod touch to a new device.
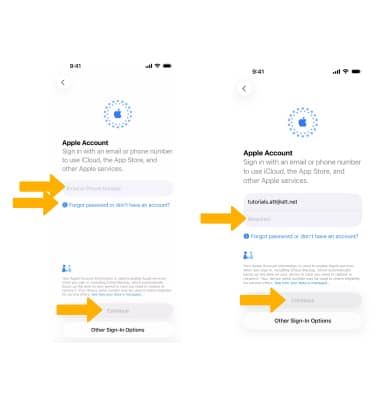
16. Enter your Apple ID then select Continue. Enter your password, then select Continue again. If you don't have one, select Forgot password or don't have an Apple ID? and follow the prompts.
Note: If your Apple ID has two-factor authentication enabled, you will receive a prompt to enter the Apple ID Verification Code. For help, visit Apple ID Support.
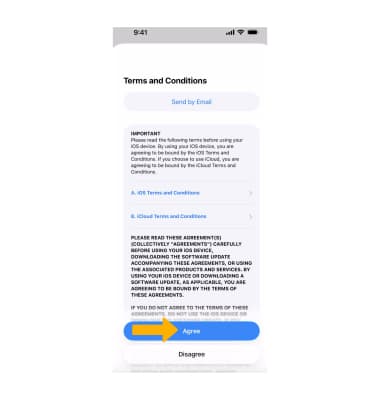
17. Review the Terms and Conditions prompt, then select Agree.
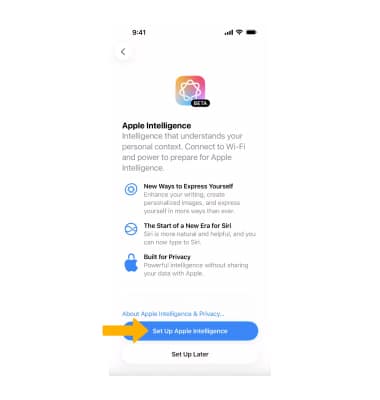
18. Review the Apple Intelligence prompt, then select Set up Apple Intelligence.
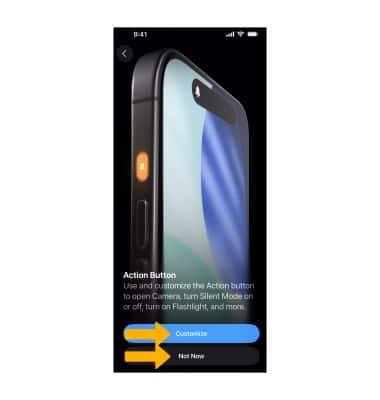
19. For iPhone 15 Pro Series & later only: Review the Action Button prompt, then select the desired option.
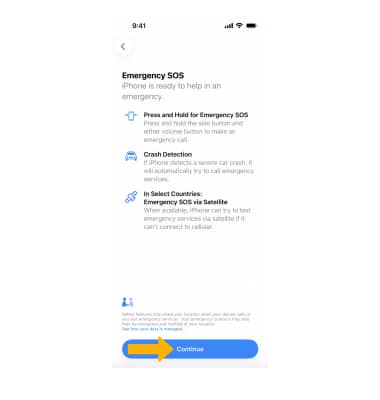
20. Review the Emergency SOS prompt, then select Continue.
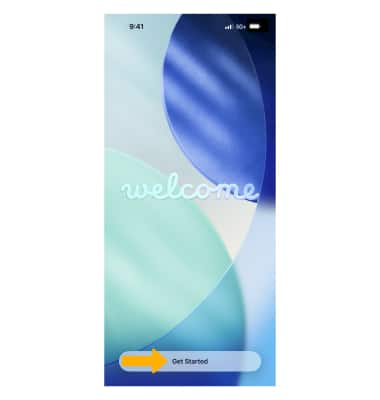
21. Select Get Started to begin using your device.
Note: Make a safe copy of your data by backing up, and learn about more features in the user guide for your iPhone. Learn more from the Apple support article Get started with iPhone.