")
In this tutorial, you will learn how to:
• Access camera modes
• Customize photo and video settings
• Crop a photo
• Access camera filters
• Customize photo and video settings
• Crop a photo
• Access camera filters
This tutorial requires you to open the Camera app. From the home screen, select the ![]() Start icon then select the
Start icon then select the ![]() Camera app.
Camera app.
Access camera modes
PANORAMA: Select the Panorama icon.
Note: Panorama allows you to create wider photos by stitching together multiple photos.

HDR: Select the HDR icon until the desired option is shown on screen.

Note: Panorama allows you to create wider photos by stitching together multiple photos.
HDR: Select the HDR icon until the desired option is shown on screen.
Customize photo and video settings
From the Camera app, select the ![]() Settings icon then edit settings as desired.
Settings icon then edit settings as desired.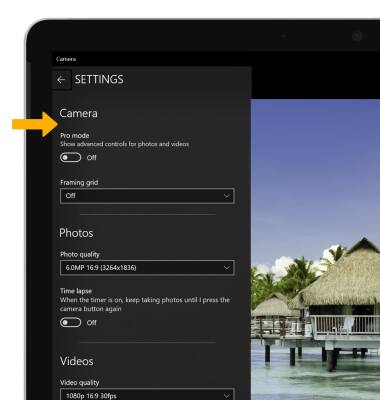
Crop a photo
1. From the home screen, select the Start icon, then scroll to and select the Photos app.
Note: Alternately, to access recent photos from the camera app select the Photos icon.
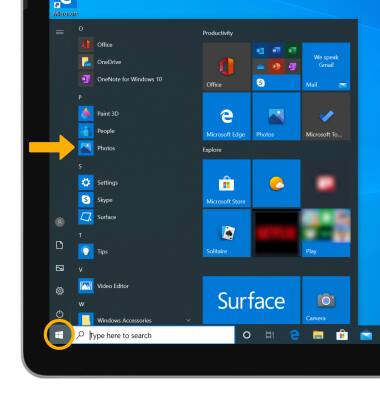
Note: Alternately, to access recent photos from the camera app select the Photos icon.
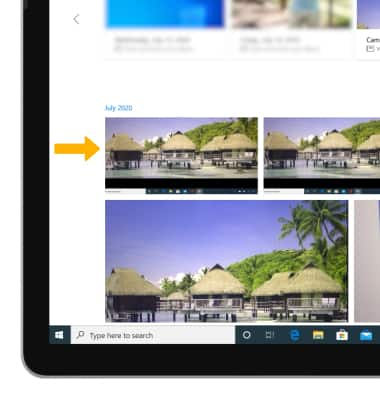
2. Navigate to and select the desired photo.
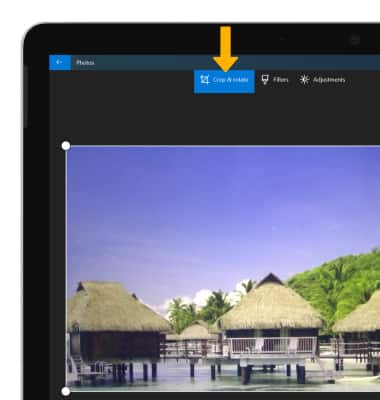
3. Select Edit & Create, then select Edit.

4. Select the Crop & rotate tab.
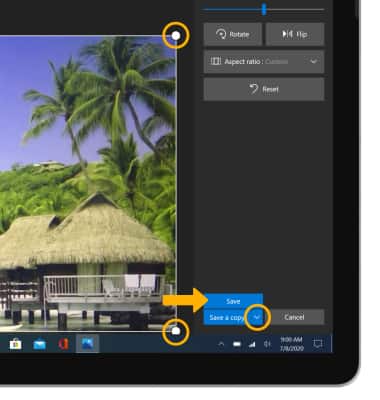
5. Select and drag the crop corners to crop as desired. Select the drop-down icon, then select the desired save option.
3. Select Edit & Create, then select Edit.
4. Select the Crop & rotate tab.
5. Select and drag the crop corners to crop as desired. Select the drop-down icon, then select the desired save option.
Access camera filters
1. From the Edit screen, select the Filters tab.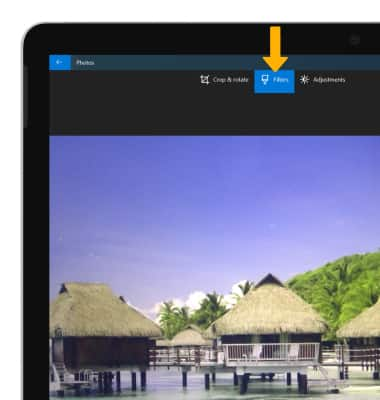
2. Select the desired filter. When finished, select the drop-down icon then select the desired save option.