")
In this tutorial, you will learn how to:
• Access camera modes
• Customize photo and video settings
• Crop a photo
• Access camera filters
• Customize photo and video settings
• Crop a photo
• Access camera filters
This tutorial requires you to open the Camera app. From the home screen, select the ![]() Start icon > All apps >
Start icon > All apps > ![]() Camera app.
Camera app.
Access camera modes
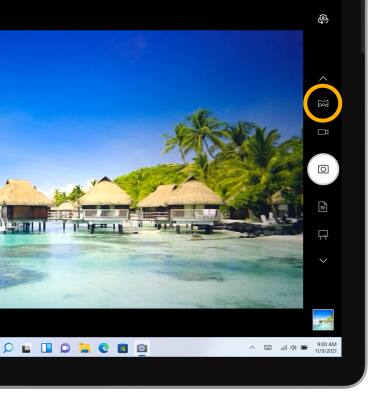
PANORAMA: Select the Panorama icon.
Note: Panorama allows you to create wider photos by stitching together multiple photos.
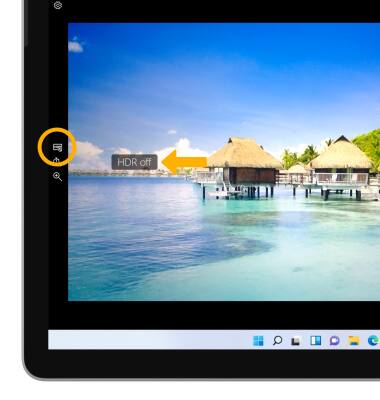
HDR: Select the HDR icon until the desired option is shown on screen.
Note: Panorama allows you to create wider photos by stitching together multiple photos.
HDR: Select the HDR icon until the desired option is shown on screen.
Customize photo and video settings
From the Camera app, select the ![]() Settings icon then edit settings as desired.
Settings icon then edit settings as desired.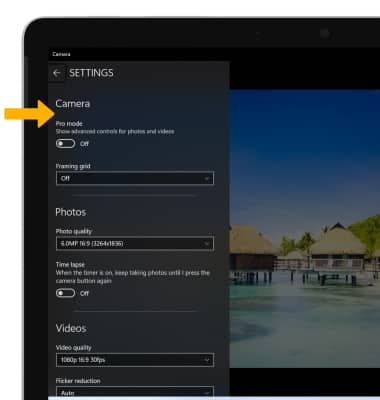
Crop a photo
1. From the home screen, select the Start icon, then select the Photos app.
Note: Alternately, to access recent photos from the camera app, select the Photos icon.
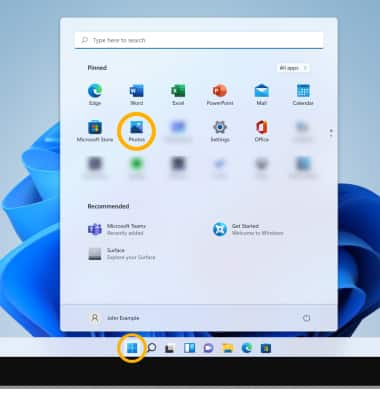
Note: Alternately, to access recent photos from the camera app, select the Photos icon.
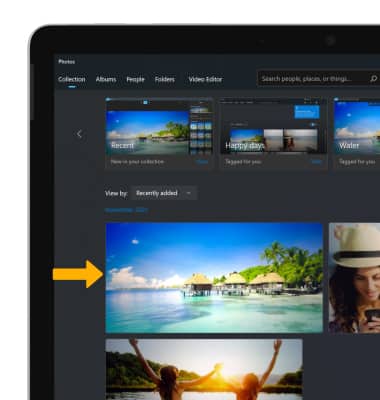
2. Navigate to and select the desired photo.
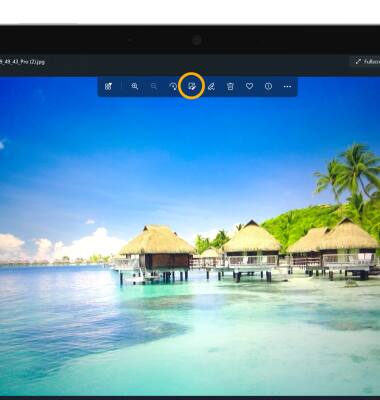
3. Select the Edit icon.
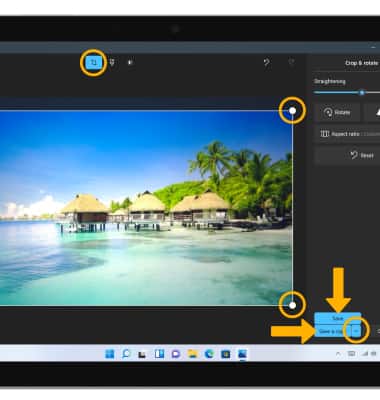
4. Select the Crop icon, then select and drag the crop corners to crop as desired. Select the drop-down icon, then select the desired save option.
3. Select the Edit icon.
4. Select the Crop icon, then select and drag the crop corners to crop as desired. Select the drop-down icon, then select the desired save option.
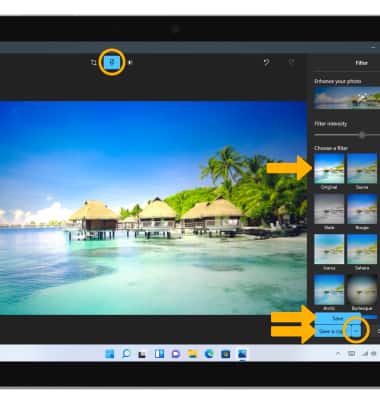
Access camera filters
From the Edit screen, select the Filters icon, then select the desired filter. When finished, select the drop-down icon then select the desired save option.