")
In this tutorial, you will learn how to:
• Access Finder
• Restore iPad from backup
• Access your device over Wi-Fi
• Automatically sync iPad
• Manually sync iPad
Access Finder
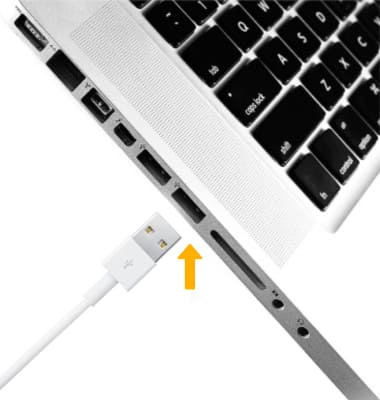
Connect the device to the computer using the included USB-C cable, then from your computer open  Finder.
Restore iPad from backup
1. Click on your Device on the left hand panel of the Finder window. Click Restore Backup, then follow the prompts.
Note: Your device must be connected to you computer using the included USB-C cable to appear in Finder. Find My must be disabled to restore your iPad. To turn off Find My, from your iPad select the Settings app > Apple ID > Find My > Find My iPad >
  Find My iPad switch.
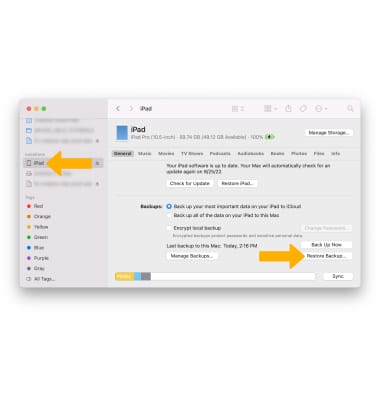
Note: Your device must be connected to you computer using the included USB-C cable to appear in Finder. Find My must be disabled to restore your iPad. To turn off Find My, from your iPad select the
Access your device over Wi-Fi
1. Click the Show this iPad when on Wi-Fi checkbox, then click Sync to confirm.
Note: Your device must be connected to you computer using the included USB-C cable to appear in Finder. Whenever the computer and the iPad are on the same network, the iPad will appear in Finder and you can sync it.
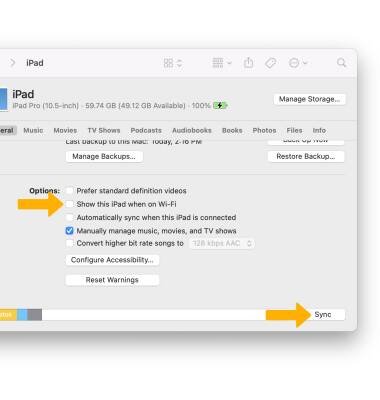
Note: Your device must be connected to you computer using the included USB-C cable to appear in Finder. Whenever the computer and the iPad are on the same network, the iPad will appear in Finder and you can sync it.
Automatically sync iPad
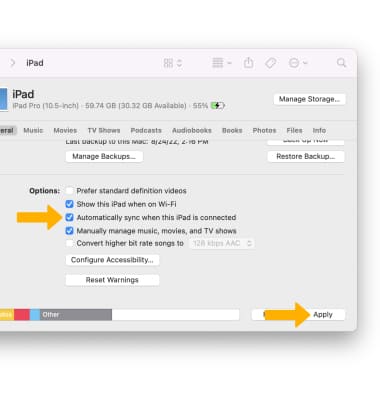
To set up automatic syncing, from the Finder window click the Automatically sync when this iPad is connected checkbox, then click Apply to confirm.
Note: The iPad will sync automatically when the iPad is connected to the computer or when the iPad is plugged in to power and the iPad and the computer are on the same Wi-Fi network.
Note: The iPad will sync automatically when the iPad is connected to the computer or when the iPad is plugged in to power and the iPad and the computer are on the same Wi-Fi network.
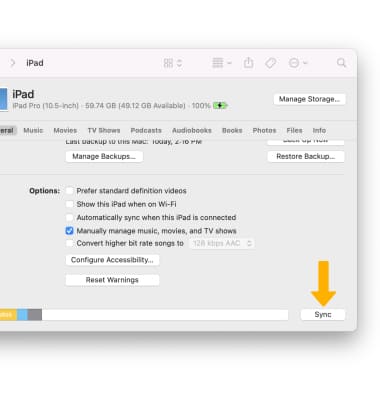
Manually sync iPad
When your iPad is connected to Finder, from the Finder window click Sync at any time to sync your iPad.
Note: Learn more from the Apple support article: Sync your iPad with iTunes using USB.
Note: Learn more from the Apple support article: Sync your iPad with iTunes using USB.