")
In this tutorial, you will learn how to:
• Access messaging
• Compose a message
• Use Digital Touch
• Share music or GIFs
• Save an attachment
• Reply or react to a message with TapBacks
• Forward a message
• Delete a message or thread
• Pin a message thread
• Edit a message
• Unsend a message
• Mark message as unread
• Schedule sending a message
• Turn iMessage on and off
• Use Live Translate
• Use iMessage with Dual SIM
• Enable Unknown Sender filter
SMS/MMS lets you send text messages and photos to other cell phones or devices. iMessage lets you send text messages, photos, and videos to other iOS devices or Macs over Wi-Fi. iMessages are billed as data usage when sent over a cellular data connection. Messages will be billed as text messages when sent to other device types, or to iOS devices using an earlier version of iOS. You need a valid phone number or Apple ID to use iMessage on iPhone. With iMessage you can also see when someone is replying to you with the ![]() Bubble icon. iMessage now supports RCS messages. RCS (Rich Communication Services) messages bring richer media and delivery and read receipts for those who don’t use iMessage.
Bubble icon. iMessage now supports RCS messages. RCS (Rich Communication Services) messages bring richer media and delivery and read receipts for those who don’t use iMessage.
You can tell which type of message you're sending by the color of the ![]() Send icon and text bubble. SMS/MMS: Send icon and text bubbles are green. iMessage: Send icon and text bubbles are blue.
Send icon and text bubble. SMS/MMS: Send icon and text bubbles are green. iMessage: Send icon and text bubbles are blue.
Access messaging
From the home screen, select the ![]() Messages app.
Messages app.
Compose a message
1. Select the ![]() Compose icon.
Compose icon.
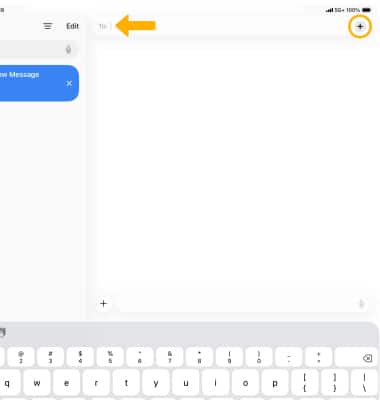
2. Enter a phone number or email address, or select the ![]() Add icon to choose a contact.
Add icon to choose a contact.
Note: To send messages to a group, enter multiple recipients. Type a name to direct a message to someone specifically within a group message. When you are mentioned, your name will be highlighted. You can also customize an active group so you only receive notifications when you are mentioned. Reply directly to a specific message within a group conversation. You can view replies in the full conversation or as their own thread for a more focused view. Learn more from the Apple support article Send a group message with your iPad.
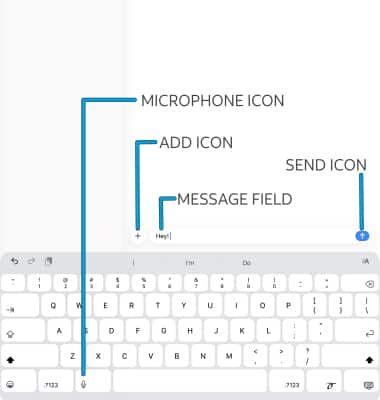
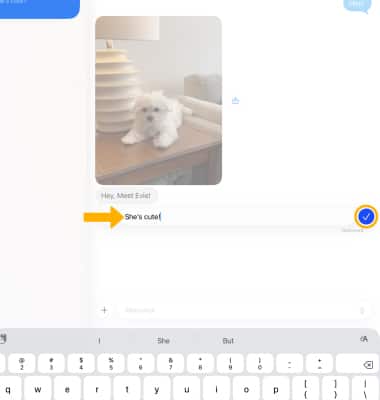
3. Type your message in the message field. Select the Microphone key to send an audio message. Select the Add icon then select the desired option to attach a photo or video, Audio message, Sicker or Location. When ready, select the Send icon.
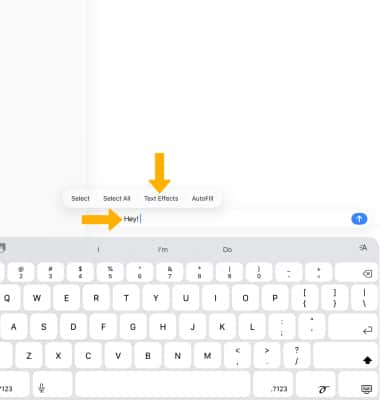
4. iMessage text effects bring conversations to life by amplifying any letter, word, phrase, or emoji with dynamic, animated appearances. To stylize your text message, select and hold the desired word then select Text Effects.
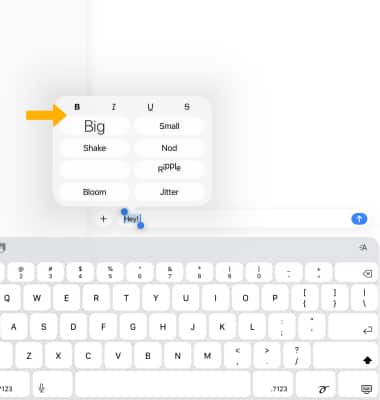
5. Select the desired text effect.
6. Select the ![]() Add icon then select the desired option to attach a photo or video, Audio message, Stickers, Polls, or apps to add to your message.
Add icon then select the desired option to attach a photo or video, Audio message, Stickers, Polls, or apps to add to your message.
Note: When sharing your location, you can also share the battery life of your iPhone, give your friends your ETA to wherever you are headed. If you don't make it on time, the location of your last iPhone unlock can be shared with family members and it can automatically call emergency services for you. You can also request someone to share their Check-in location with you in the messages app.

7. When finished, select the ![]() Send icon.
Send icon.
8. An exclamation mark appears if your recipient didn't get the message. Select the Exclamation mark, then select Try Again to send the message again.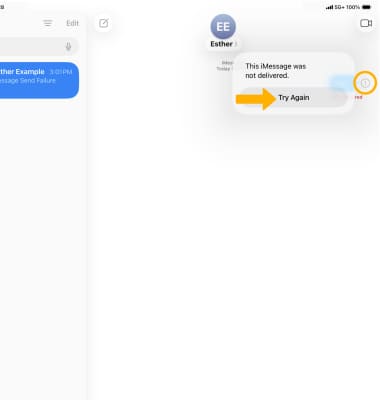
Use Digital Touch
Select the ![]() Add icon > More >
Add icon > More >  Digital touch icon to draw messages or pictures.
Share music or GIFs
Select the ![]() Add icon > More >
Add icon > More > ![]() Music to share songs. Select
Music to share songs. Select ![]() #images to share GIFs or other recently used images.
#images to share GIFs or other recently used images.
Save an attachment
Select and hold the desired attachment, then select Save.
Note: Attachments are saved according to their file type. To view saved photos and videos, from the home screen, select the ![]() Photos app.
Photos app.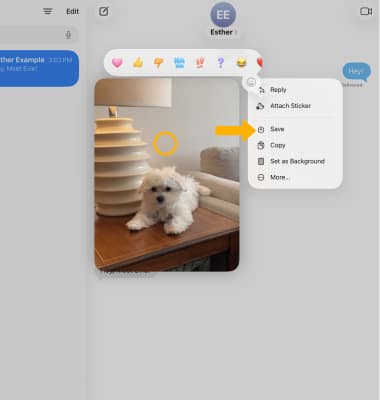
Reply or react to a message with TapBacks
REPLY TO A MESSAGE: From the desired message thread, compose your message in the message field then select the ![]() Send icon.
Send icon.
Note: You can swipe right on any message to send a reply to an individual message. From the desired message thread, select the ![]() catch-up arrow to jump to the first message you haven't read in a conversation.
catch-up arrow to jump to the first message you haven't read in a conversation.
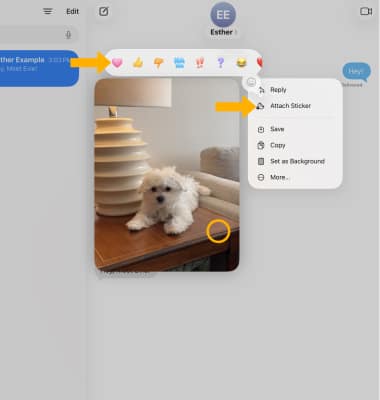
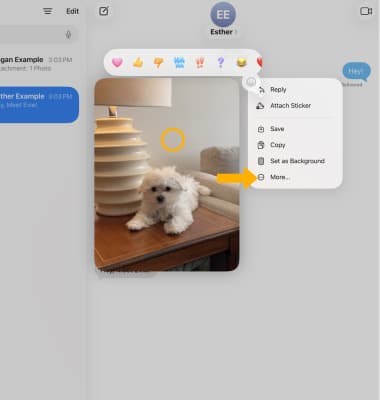
REACT TO A MESSAGE WITH TAPBACK: Select and hold the desired message then select the desired reaction. Select Attach Sticker to react with a sticker.
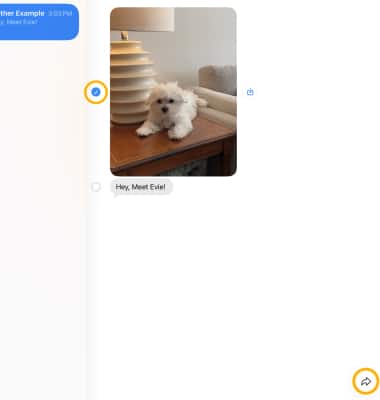
Forward a message
1. Select and hold the desired message, then select More.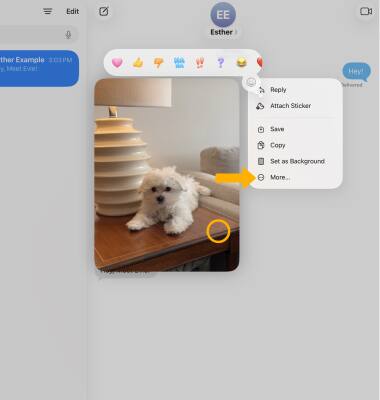
2. Select the desired message(s), then select the Forward icon.
3. Enter the desired contact or phone number, then select the Send icon.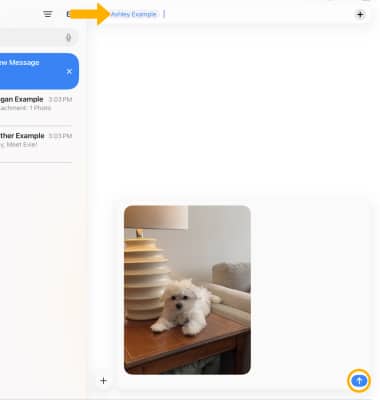
Delete a message or thread
1. To delete a message, select and hold the desired message then select More.
2. Select the desired message(s), then select the ![]() Delete icon. Select Delete Message to confirm.
Delete icon. Select Delete Message to confirm.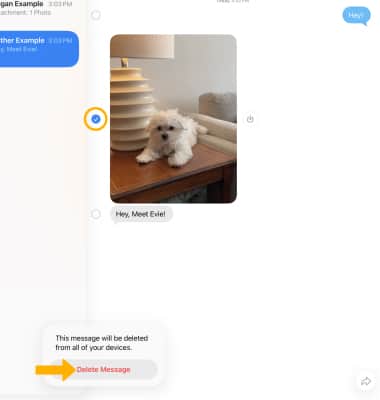
3. To delete an entire message thread, from the Messages screen, select and drag the desired message thread to the left then select the Delete icon.
Note: You will be prompted to select Delete to confirm. Alternately, select and hold the desired message thread then select Delete. After you delete a conversation, you can recover it only by restoring from a backup. Learn more from the Apple support article Send messages with your iPhone. If you can't send or receive messages on your iPhone, click here.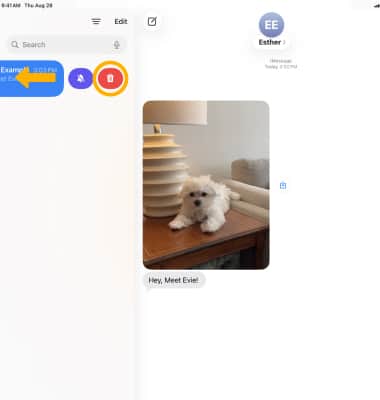
Pin a message thread
1. To pin a message thread, from the Messages screen select and hold the desired message thread.
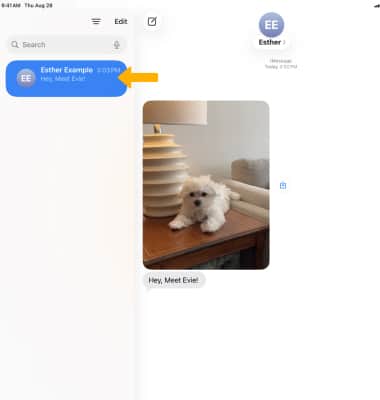
2. Select Pin.
Note: To unpin a message thread, select and hold the desired pinned message thread then select Unpin.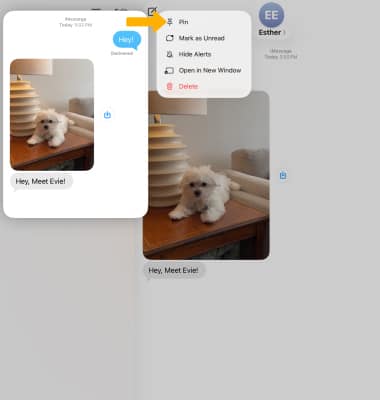
Edit a message
1. Select and hold the desired message, then select Edit.
Note: Messages can only be edited within 15 minutes of initially being sent.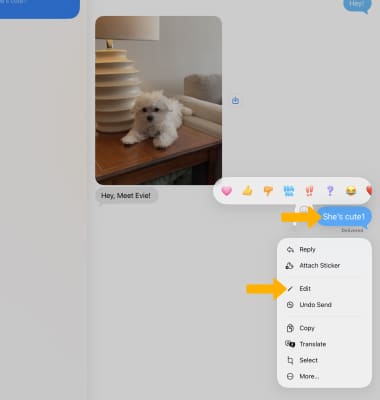
Unsend a message
Select and hold the desired message then select Undo Send. The message will be unsent.
Note: Undo Send is available for 10 seconds after sending a message. If the recipient has not updated to iOS16, they may still see the message.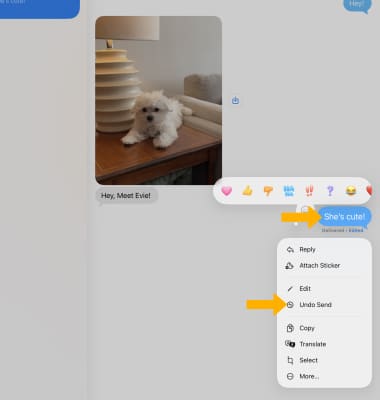
Mark message as unread
From the Messages inbox, swipe right on the desired message thread then select the Unread icon.
Note: Alternately, swipe right on the desired message thread to the right edge of the screen and release.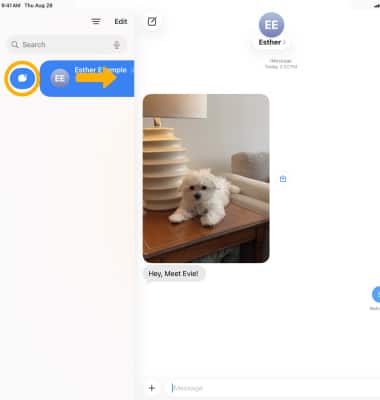
Schedule sending a message
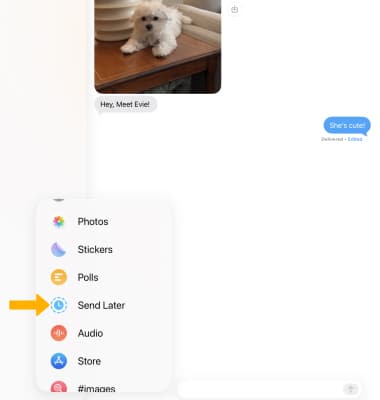
1. Select the ![]() Add icon, then select Send Later.
Add icon, then select Send Later.
2. Select the time to set the desired time.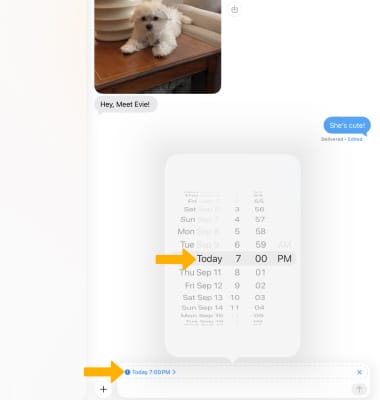
3. Enter the desired message, then select the Send icon.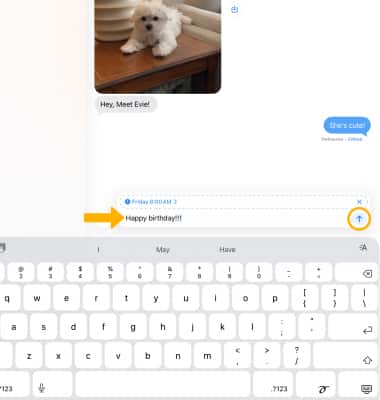
Turn iMessage on or off
From the home screen, select the ![]() Settings app > scroll to and select Apps > Messages > select the
Settings app > scroll to and select Apps > Messages > select the ![]() iMessage switch to turn it on or off.
iMessage switch to turn it on or off.
Note: If you get an error when trying to activate iMessage, click here.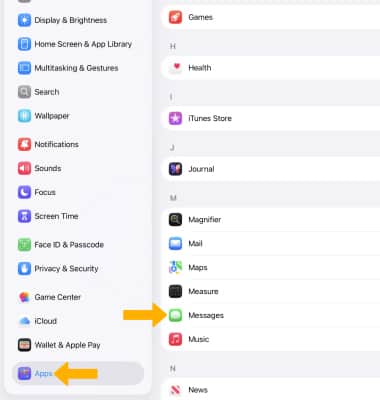
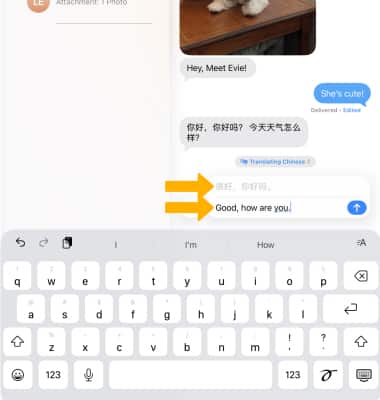
Use Live Translate
1. From the desired message thread, select and hold the desired message then select Translate.
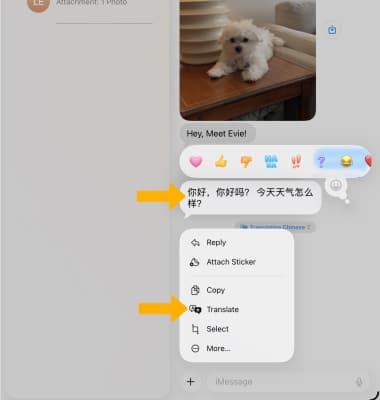
2. The translation will be displayed. To hear the translation read aloud, select the Play icon.
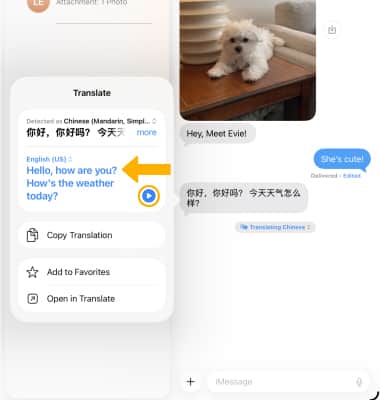
3. When you type a response, your message will automatically be translated.
Use iMessage with Dual SIM
When composing a new message with Dual SIM enabled, you will have the option to switch between sims before sending a new message. From the new message screen, enter the desired contact. Select current line, then select the desired line.
Enable Unknown Sender Filter
With iOS 26, you can now screen unknown senders which will move messages into the Unknown Senders list. This is disabled by default. To enable, navigate to and open the ![]() Settings app > scroll to and select Apps > Messages > select the
Settings app > scroll to and select Apps > Messages > select the ![]() Screen Unknown Senders switch.
Screen Unknown Senders switch.