")
- The Gear S2 Classic is certified for IP68 protection against dust, and water submersion up to 1 meter. Press and hold the Power/Home button to turn on the watch.
Note: The SIM card comes preinstalled and cannot be removed.
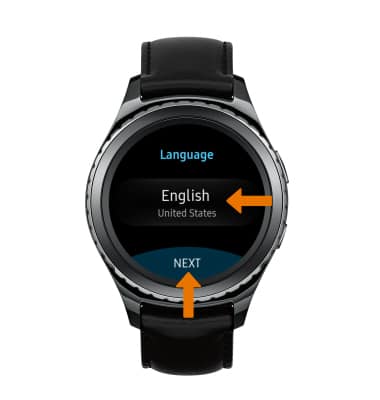
- Select the language preference, then select NEXT.
- To connect your watch with your smartphone, the Samsung Gear Manager app must be installed on your smartphone. If installed, swipe up or down on the home screen to access the Apps tray > Samsung folder > Samsung Gear app.
Note: To install the Samsung Gear app, from the home screen select the Play Store app > search for Samsung Gear > INSTALL > ACCEPT > OPEN.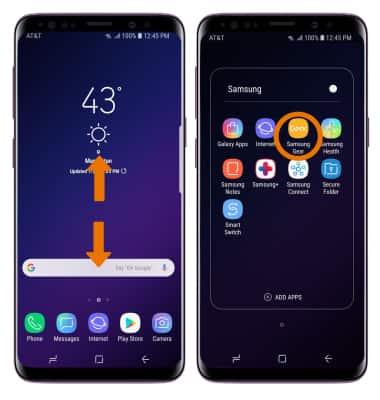
- Select START THE JOURNEY, then follow the prompts to select your Gear.
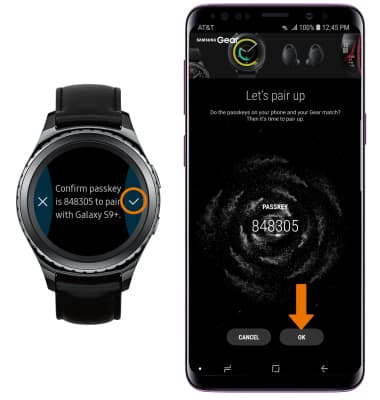
Note: Confirm that the smartphone has found the watch by comparing the number in parentheses with the number displayed on the watch. The device will begin to connect.
- A Bluetooth passkey will be displayed on the watch. Confirm that the passkeys match on the both devices. Select the Checkmark icon on the watch and select OK on the phone.
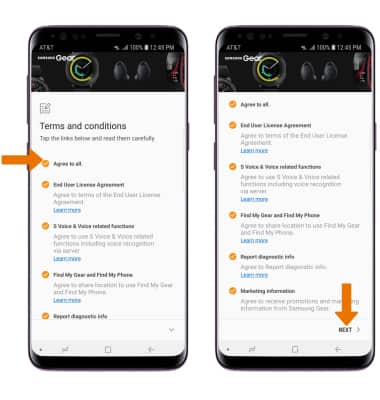
- Review the End User License Agreement, then select the Agree circles as desired. Select NEXT.
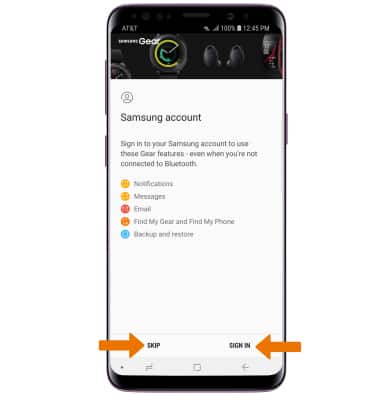
- If you have not done so already, you will be prompted to add your Samsung account. It is not required but if you skip this step, you will miss more functionality such as the ability to set the reactivation lock (in both Bluetooth and Standalone mode), receiving Message/Email notifications through the Samsung server when the device is in standalone mode, and being able to download apps/watch faces. Select SKIP or SIGN IN and follow the on-screen prompts.
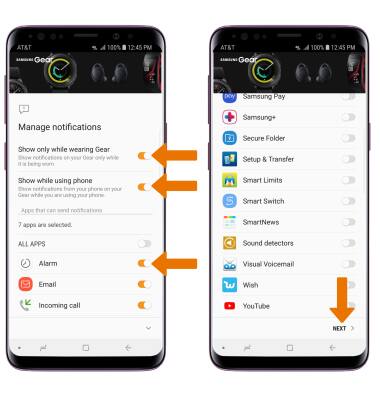
- Review the Manage notifications prompt, then select the desired switches to enable or disable them. When ready, select NEXT.
- Setup is now complete.
Getting Started
Samsung Gear S2 classic (R735A)
Getting Started
How to get started with your new device.
INSTRUCTIONS & INFO